Looking to add soft, elegant florals to your bullet journal or sketchbook? Learn how to draw a Camellia flower drawing in simple steps with tips, doodle ideas, and sketch inspiration that even beginners can follow.
Why Draw Camellia Flowers?
There’s something quietly beautiful about the Camellia. With its gentle overlapping petals and graceful shape, it makes a stunning floral feature for your journals, wall art, or stationery design.
Camellias symbolize love, admiration, and devotion.
In Japanese culture, they’re known as Tsubaki and have been used in traditional art for centuries. If you’re aiming for a detailed Camellia flower sketch or even a quick Camellia doodle, drawing one is a peaceful and creative way to connect with nature on the page.
How To Draw A Camellia Flower Doodle
Camellia doodle supplies
Here are some supplies that will help you create amazing doodles:
- Paper or sketchbook
- Dual Brush Pens
- Pencil or mechanical pencil with a good eraser
- Or drawing pen (this is our favorite)
- Colored pencils or markers if you feel like adding color
- Optional: white gel pen for highlights or cute lil details


If you prefer digital drawing, Procreate or a similar app is perfect for floral line art.
Ideas for Where to Use Your Camellia Drawing
Your Camellia doodle can add gentle beauty to lots of creative spaces:
- Bullet Journal Cover Pages – A Japanese Camellia flower drawing looks amazing with soft pastel backgrounds.
- Habit or Mood Trackers – Color in camellia line art petals as you track habits or moods.
- Greeting Cards or Gift Tags – Handmade touches always feel special.
- Wall Art – Turn your sketch into printable art for your home.
- Digital Stickers – Scan your drawing and turn it into digital design assets.
This flower works well for both minimal and full floral arrangements. You can even pair it with roses, peonies, or other botanical sketches to create a Camellia bouquet illustration.
Tips for Drawing Beautiful Camellias
Here are some helpful drawing tips to make your Camellia drawings stand out:
- Start with light pencil strokes so you can build the shape slowly.
- Study real Camellias or photos to see how petals curve and fold.
- Practice different angles like side views or half-open blooms.
- Try monochrome line art or full-color versions to see which style feels best for your project.
- Don’t stress about perfection. Even a loosely drawn Camellia has charm!
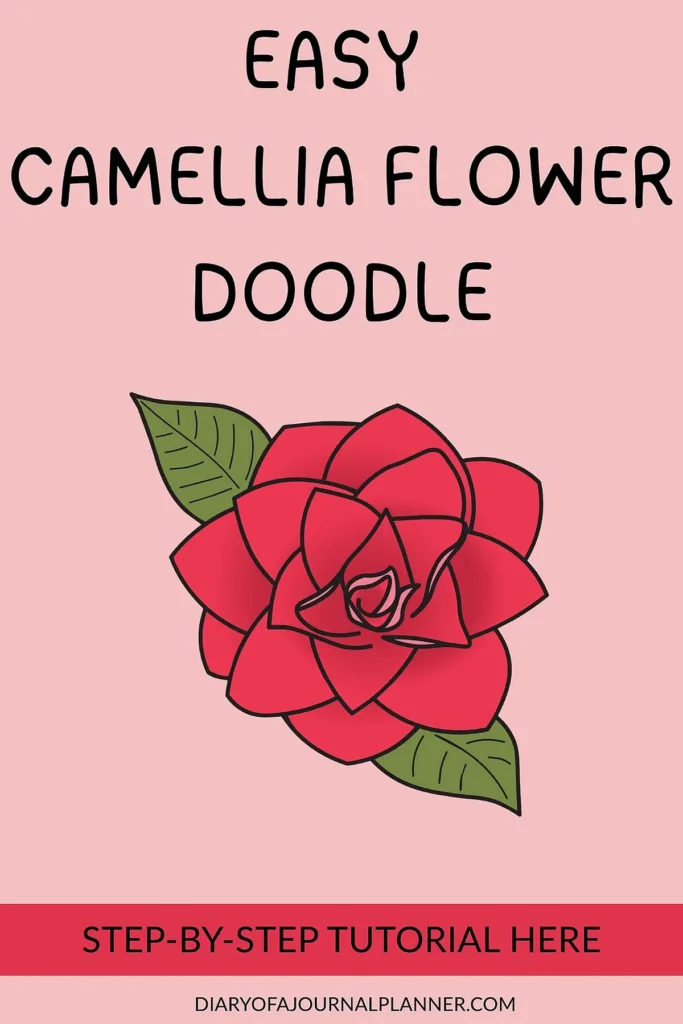
Camellia Flower Drawing: How To Draw Camellia Doodle
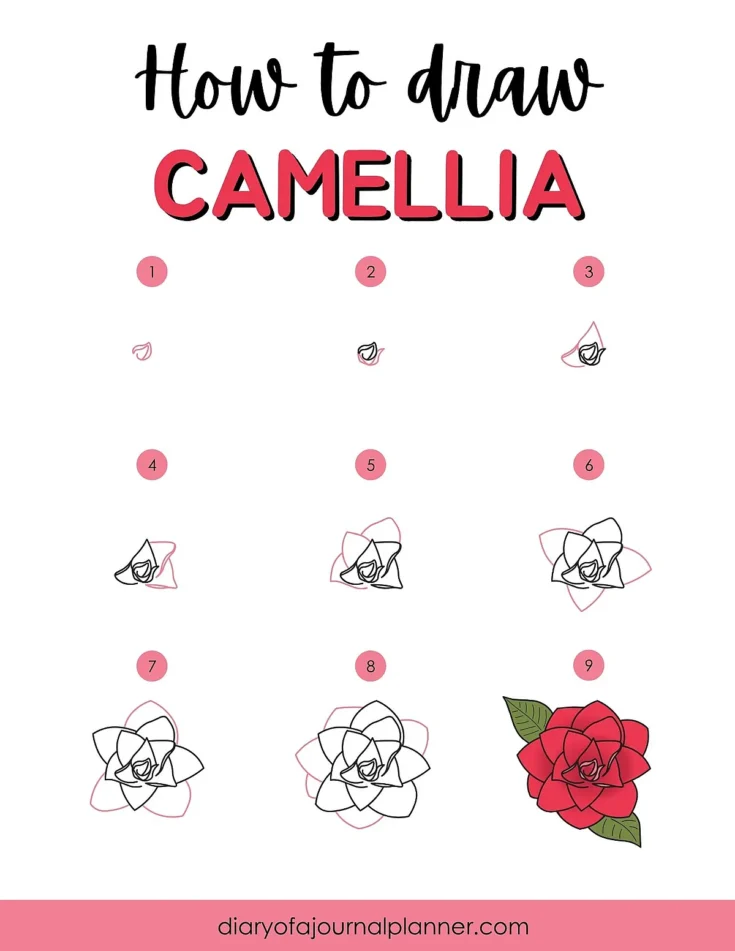
Follow along with our easy Camellia doodle tutorial. Simply follow each step by drawing the part of the doodle in PINK.
Instructions
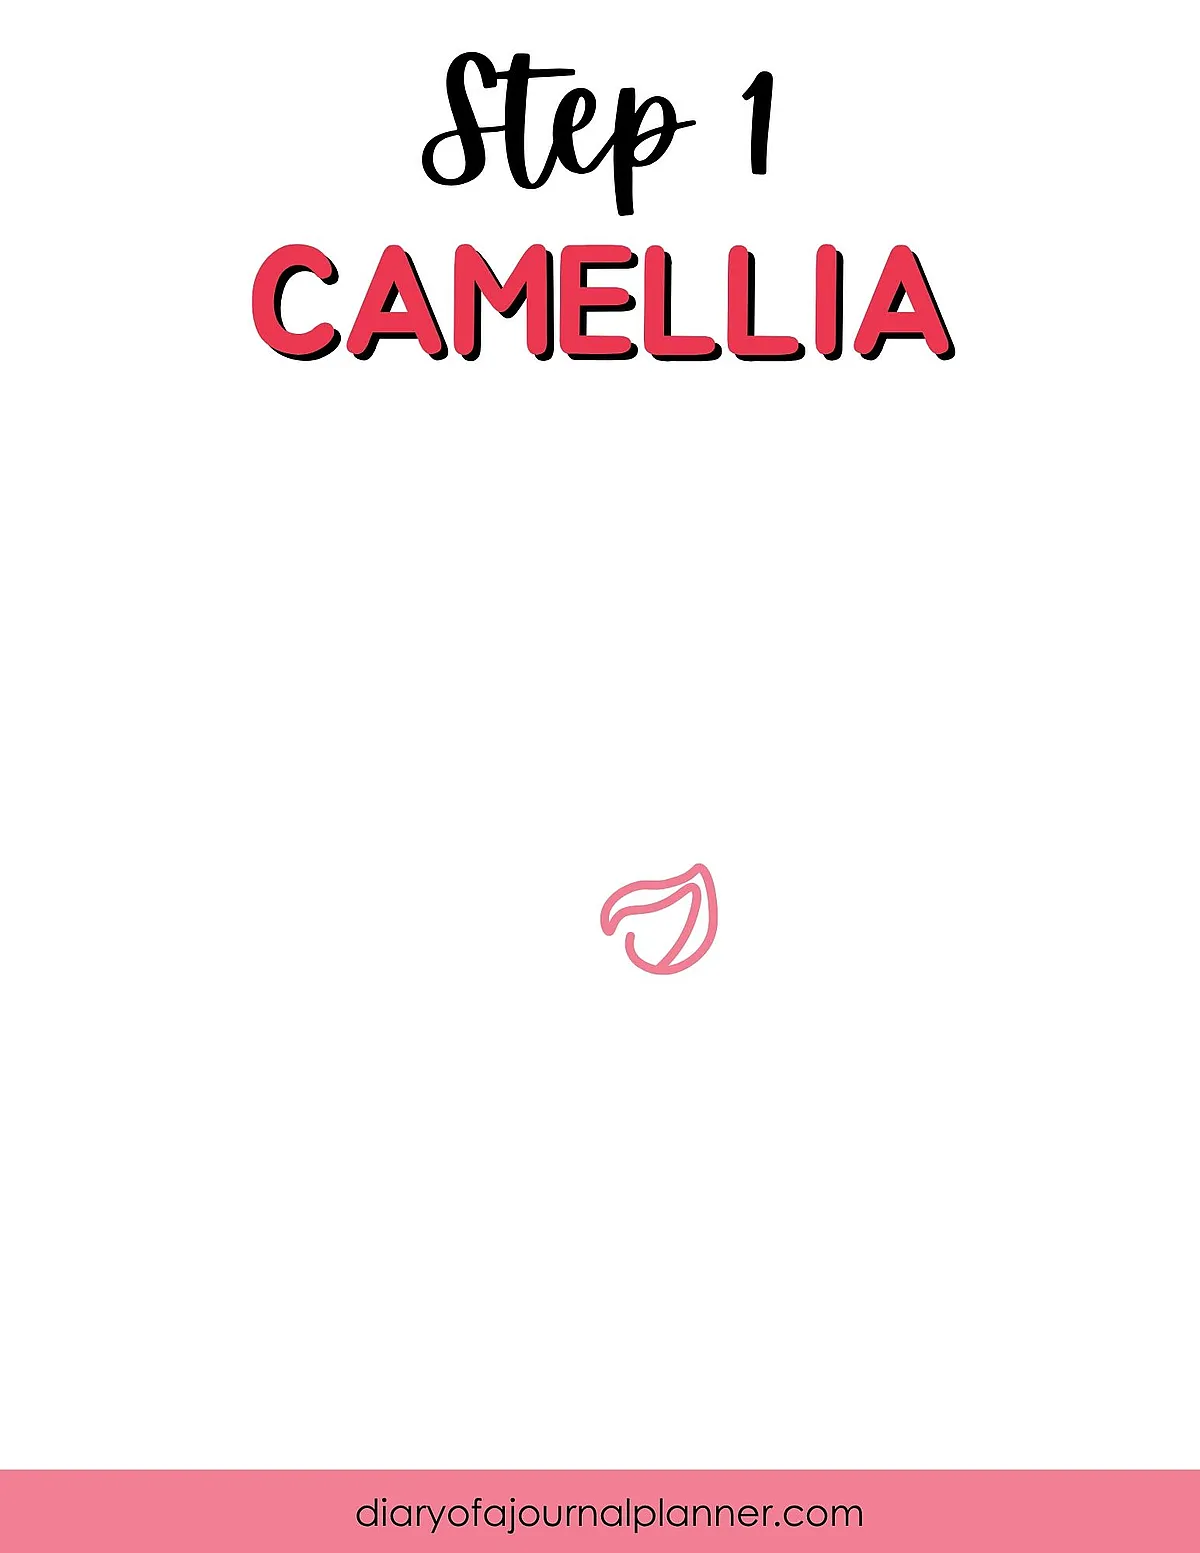
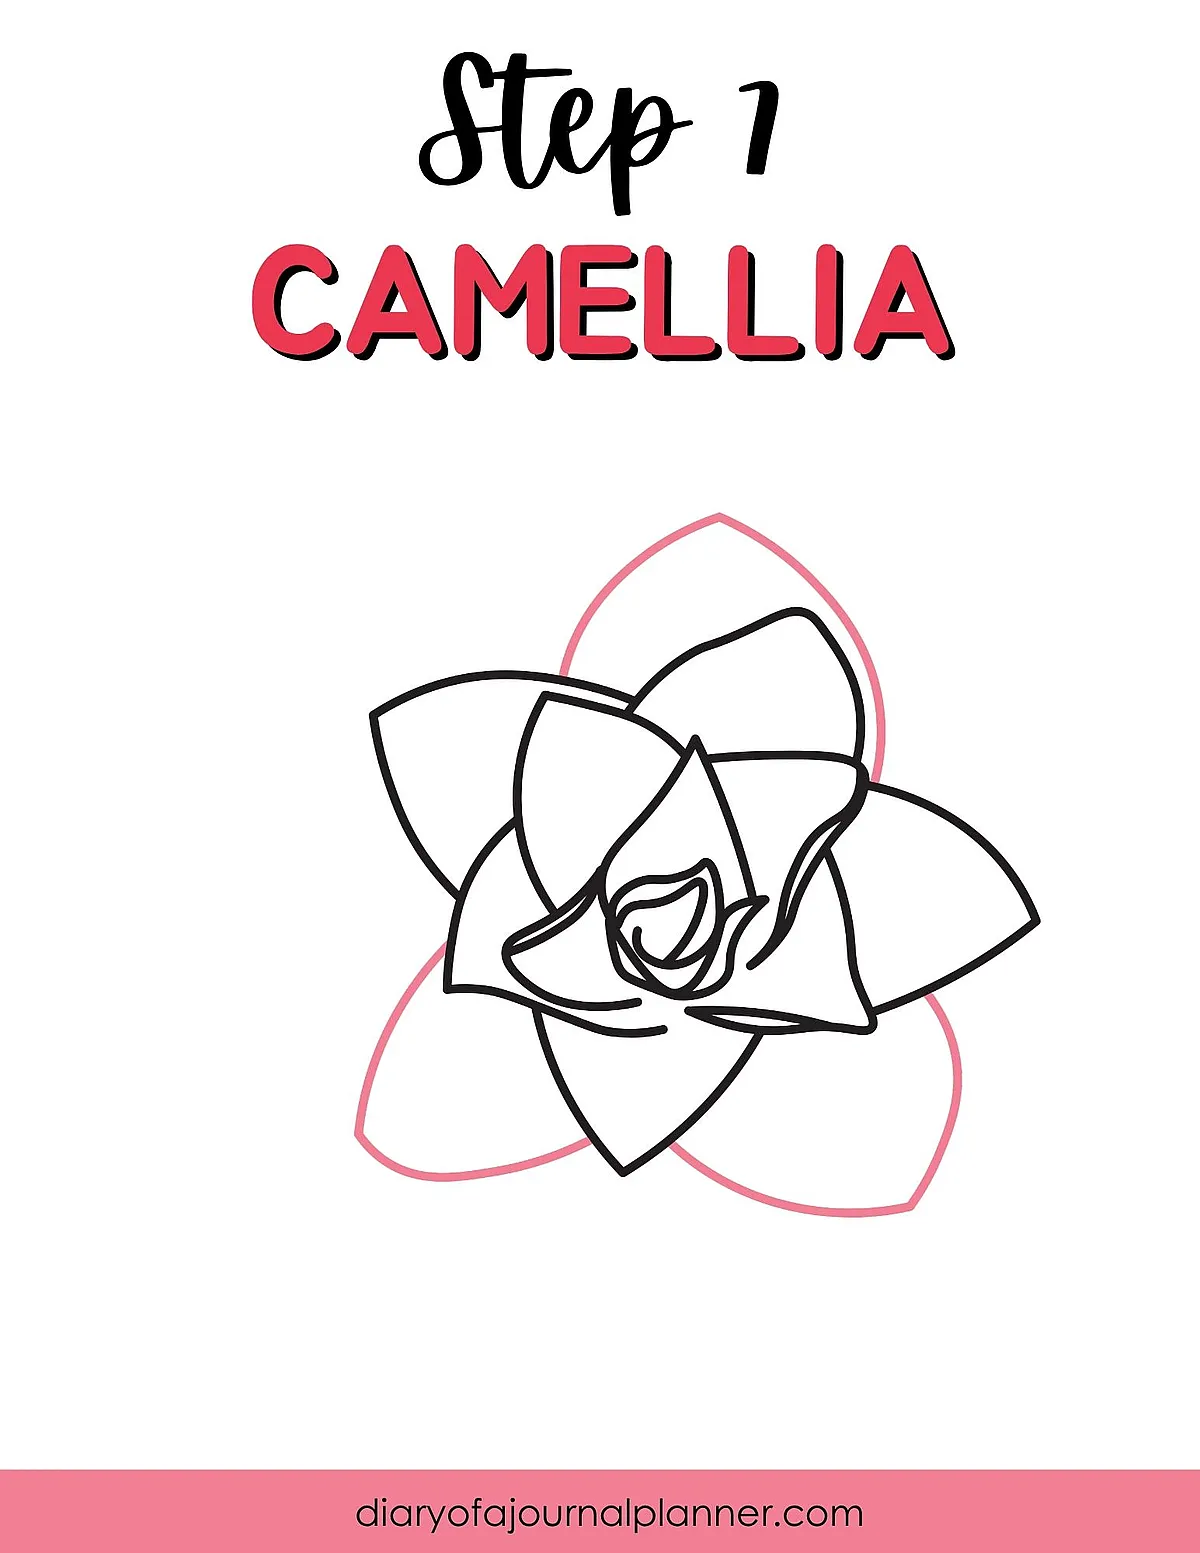
Step 1
Decide where you want your Camellia drawing doodle on the page and start by drawing the center of the bloom. Try to copy a similar shape to the image. it kind of looks like an elves ear!
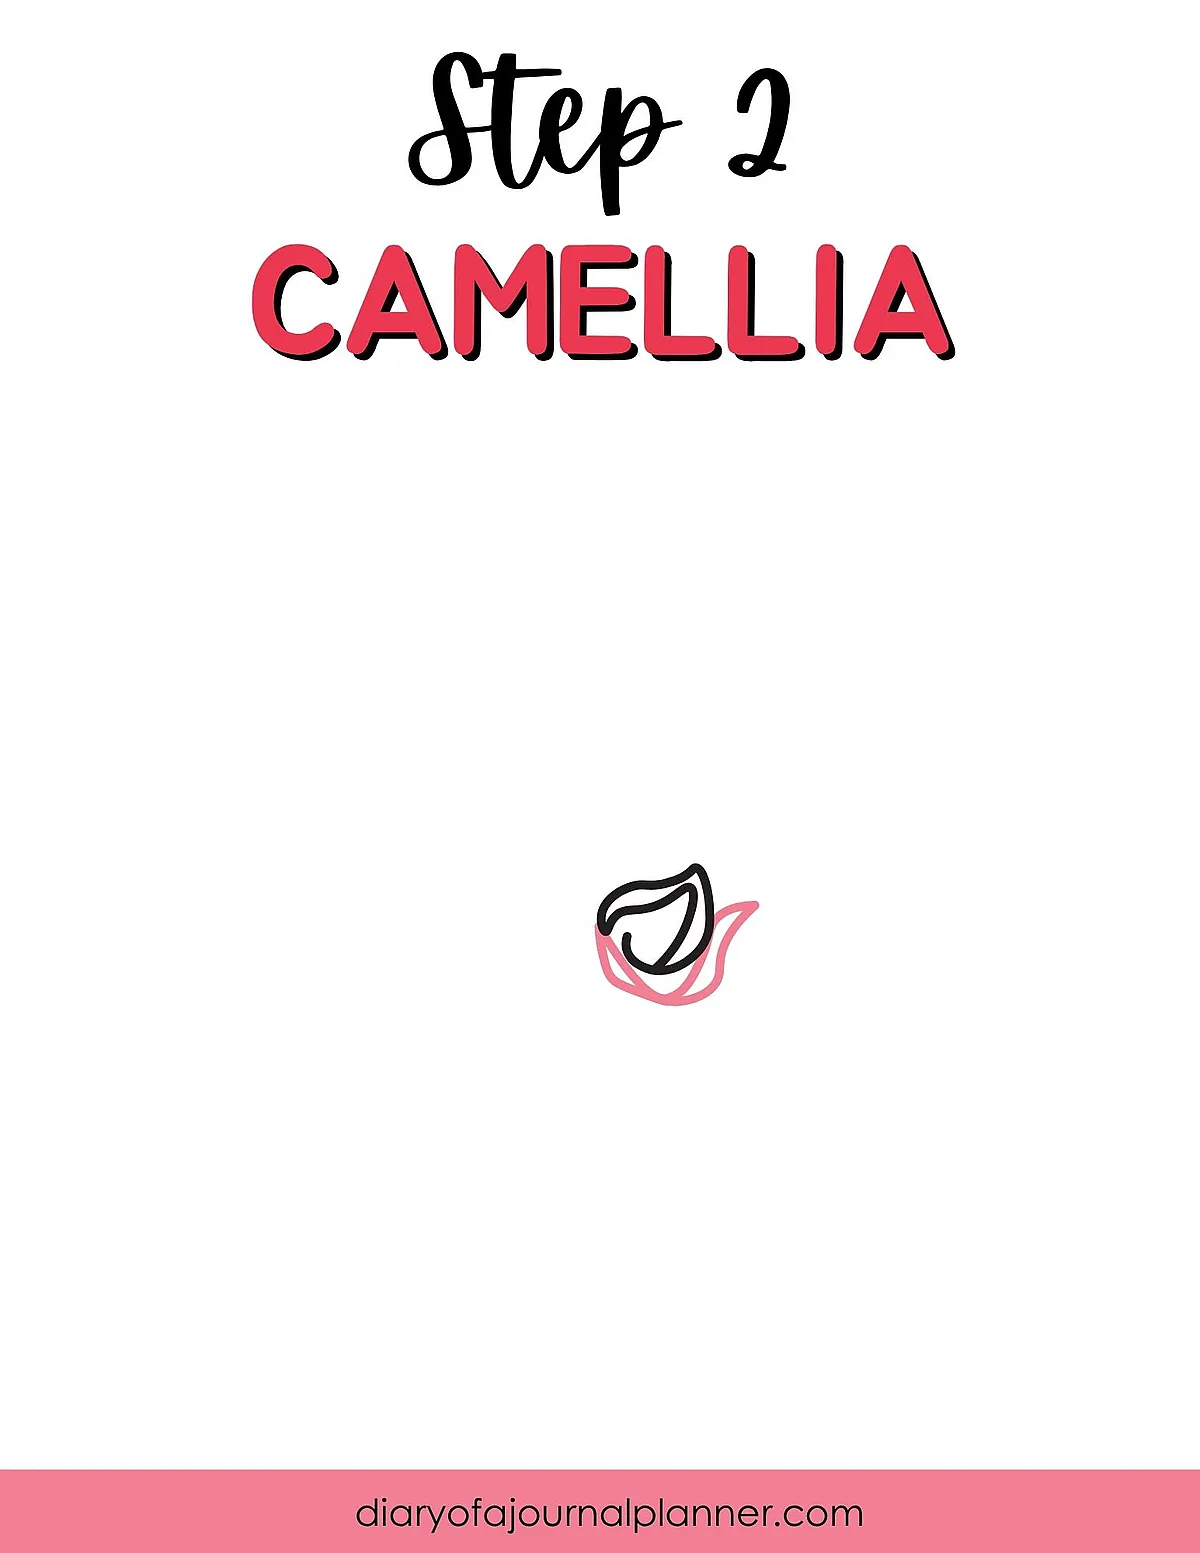
Step 2
Next add more to the center of your Camellia flower. Giving an enclosed look.
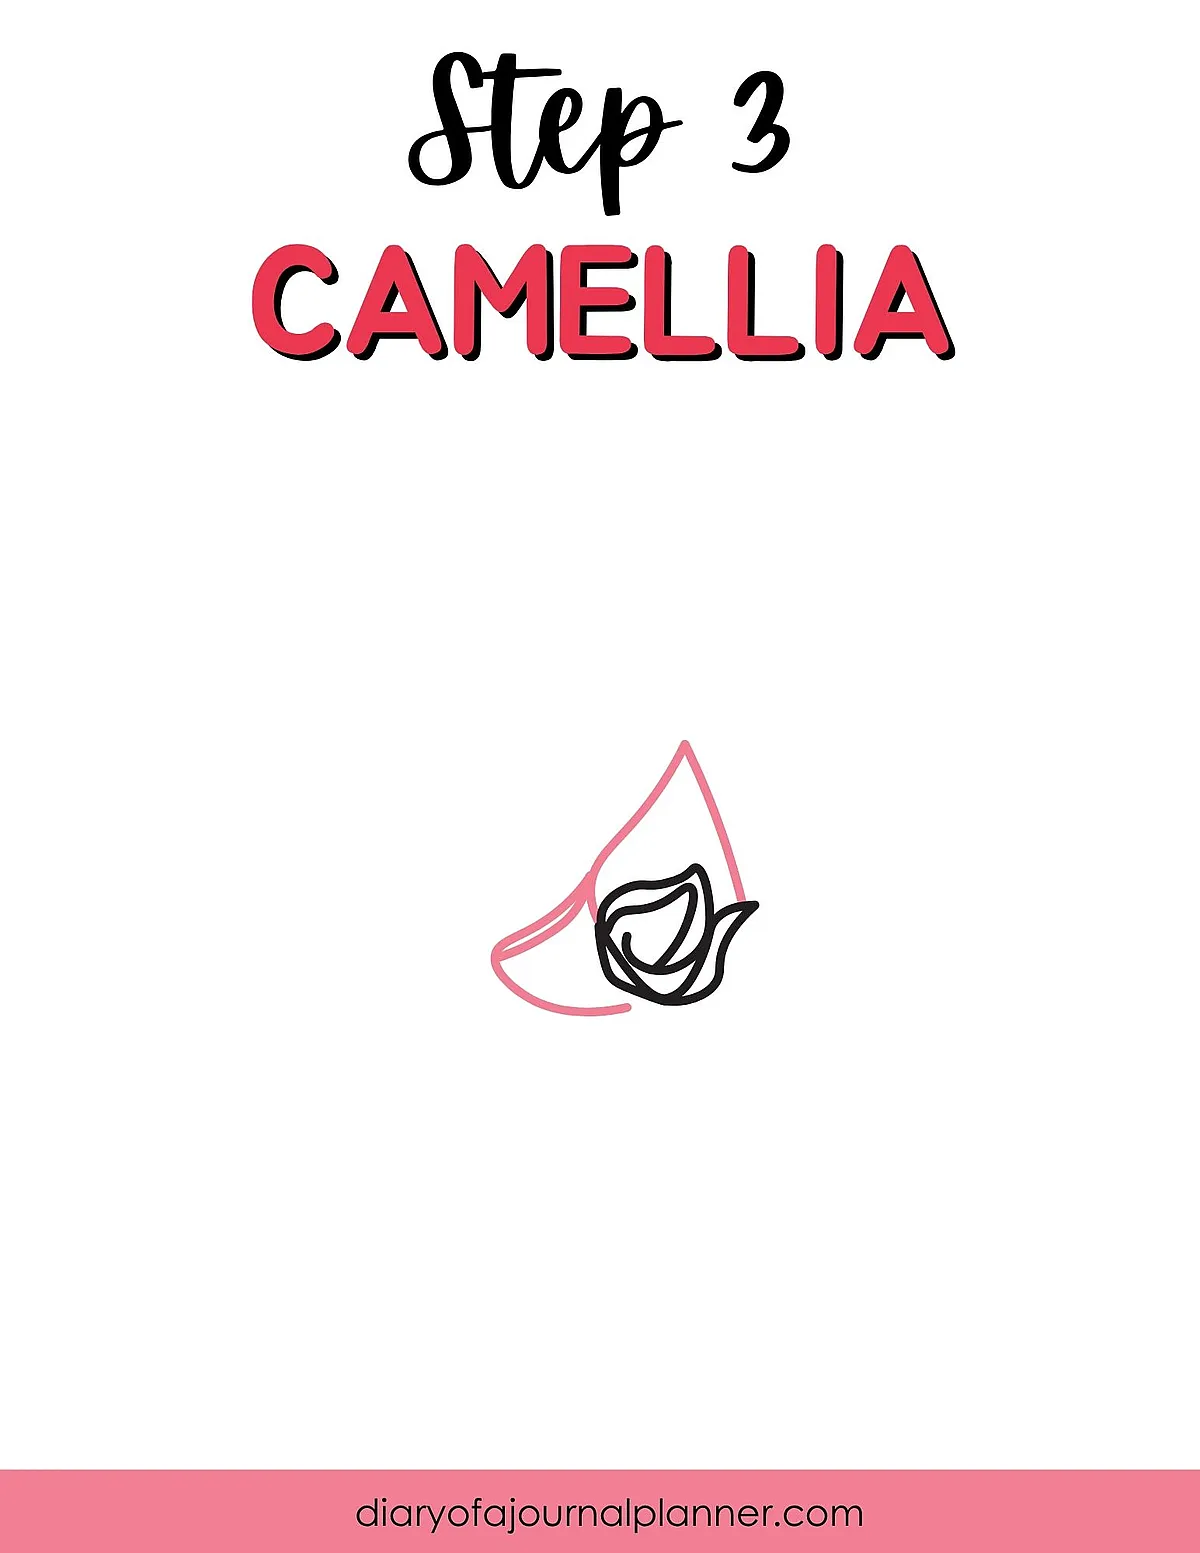
Step 3
Draw tiny, rounded petals close to the center. Camellias have layered petals, so start small and build out
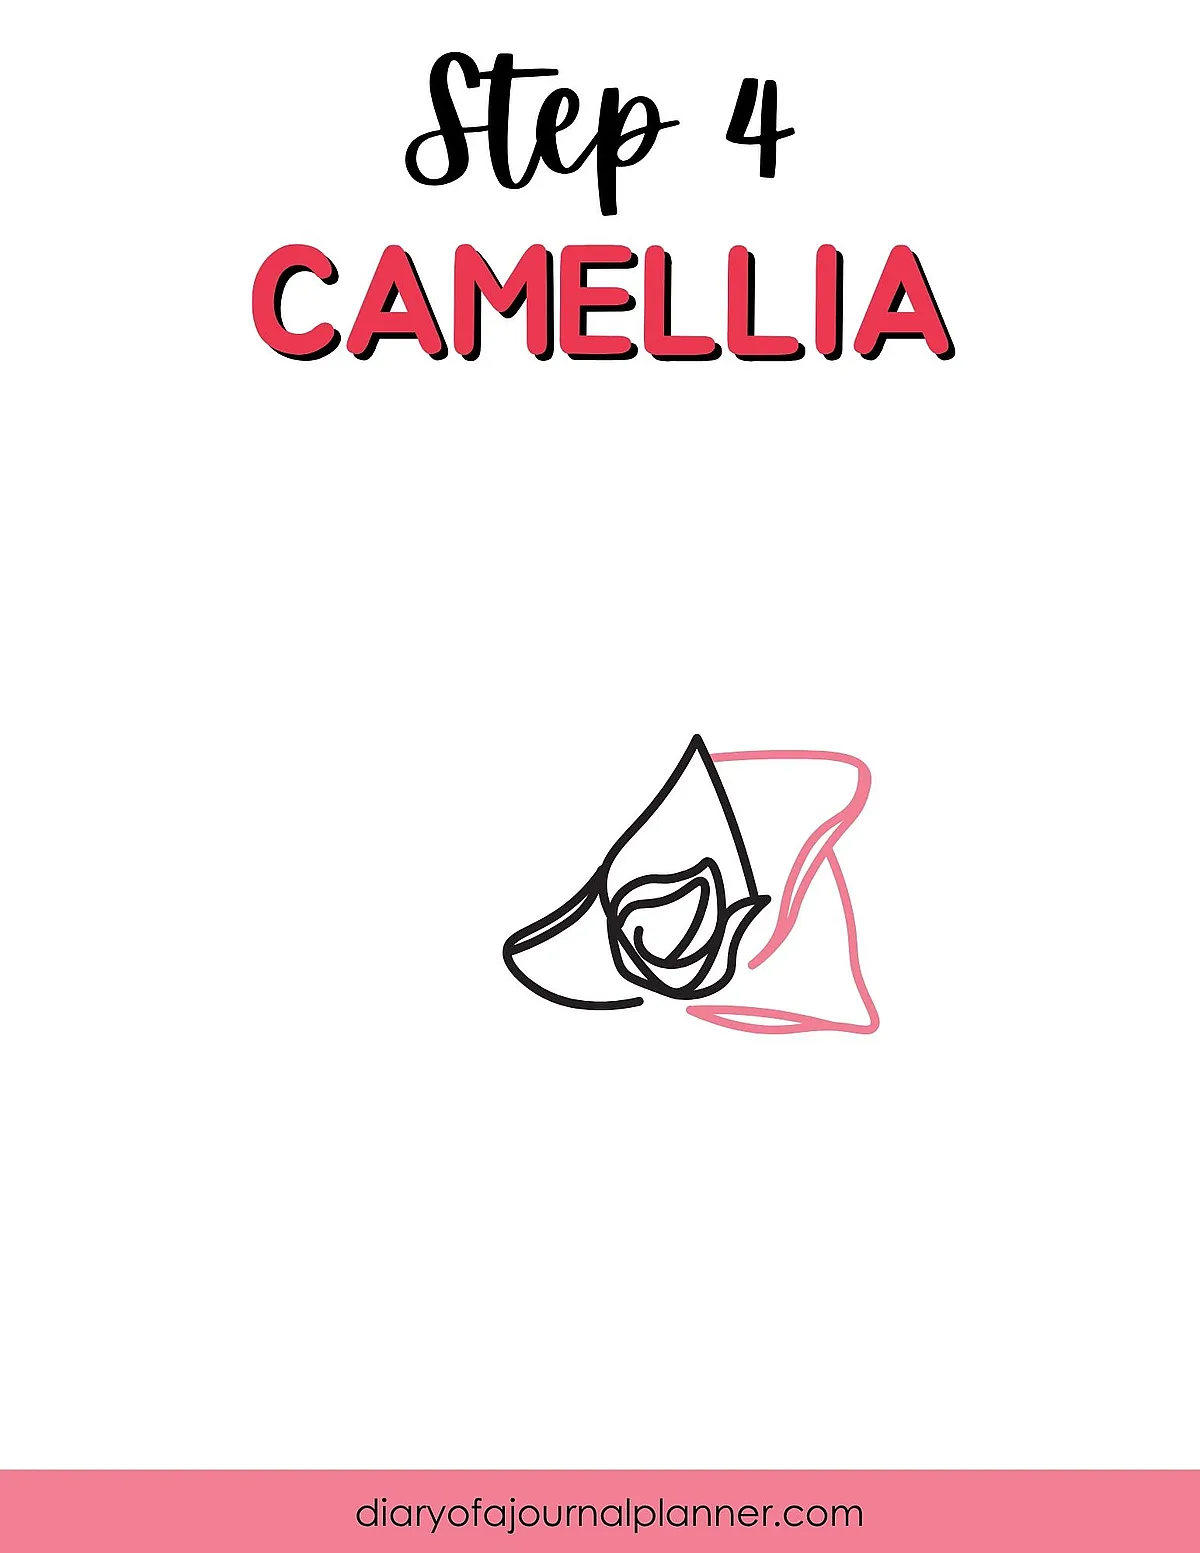
Step 4
Start to add more petals, going around the center. You can add extra lines to the outer parts of the petals to create a realistic 3D look.
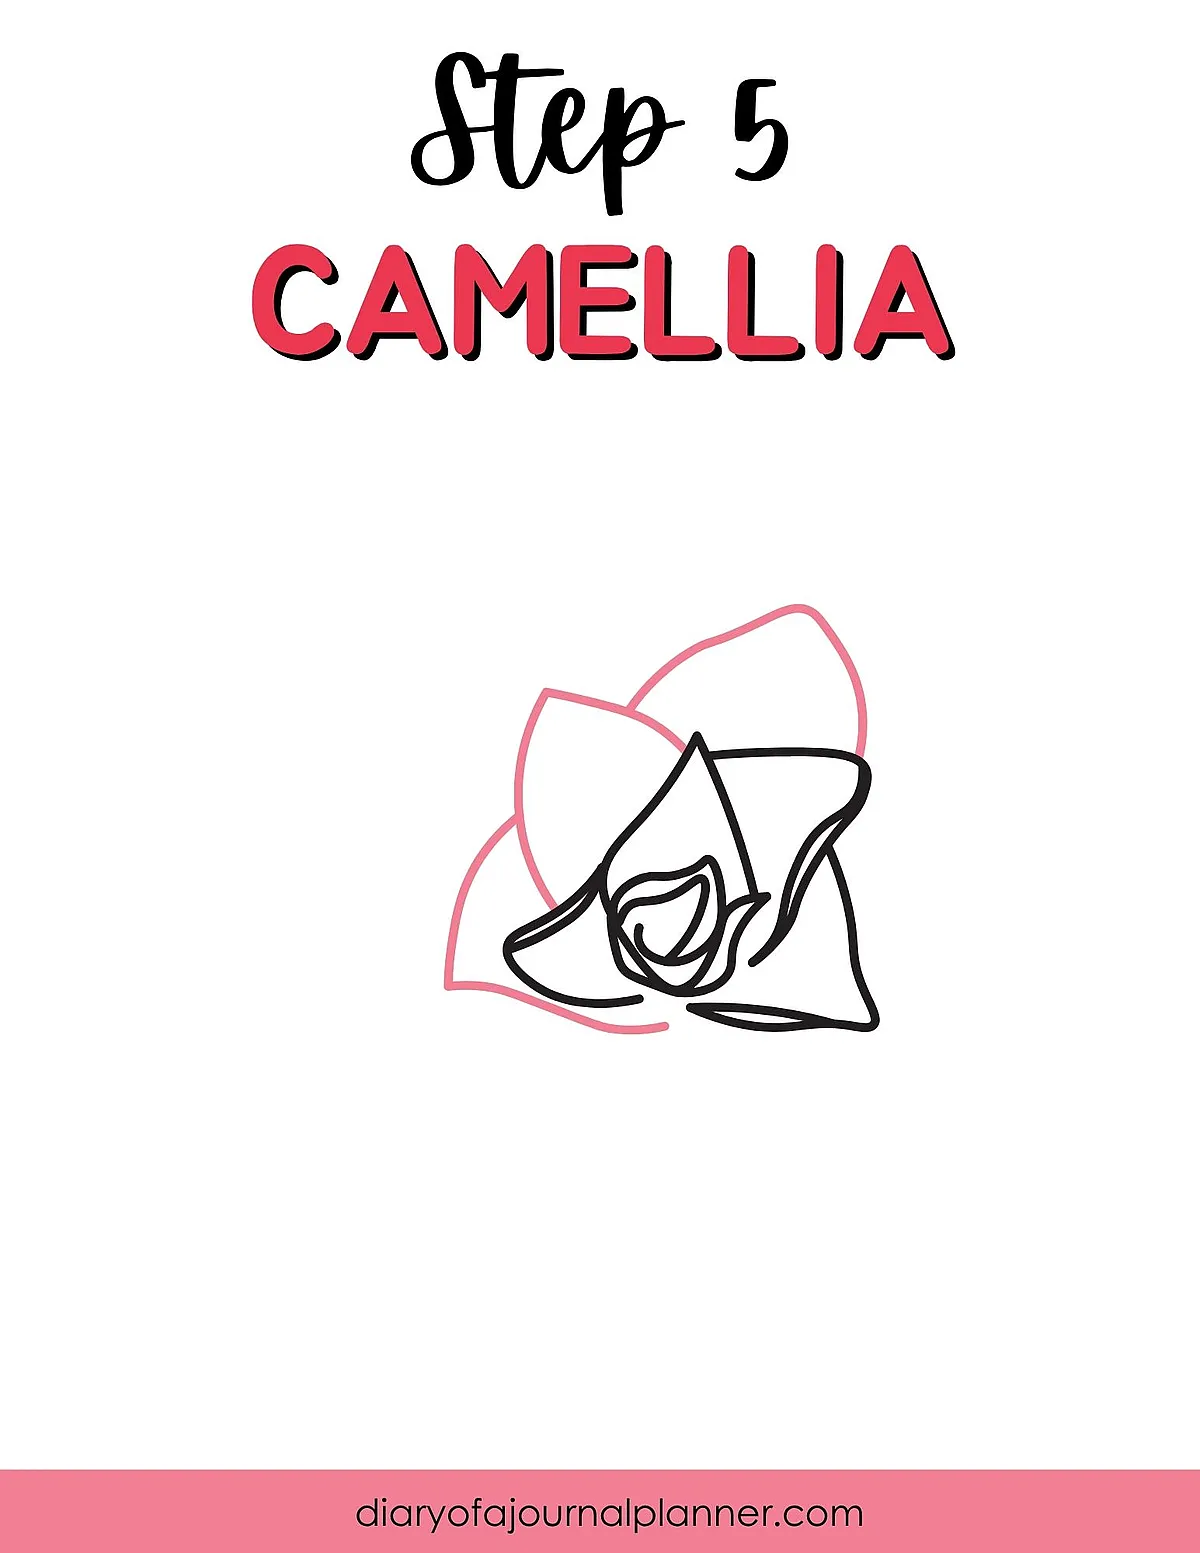
Step 5
Add more petals around the first layer. Let them overlap slightly to create that full, soft look.
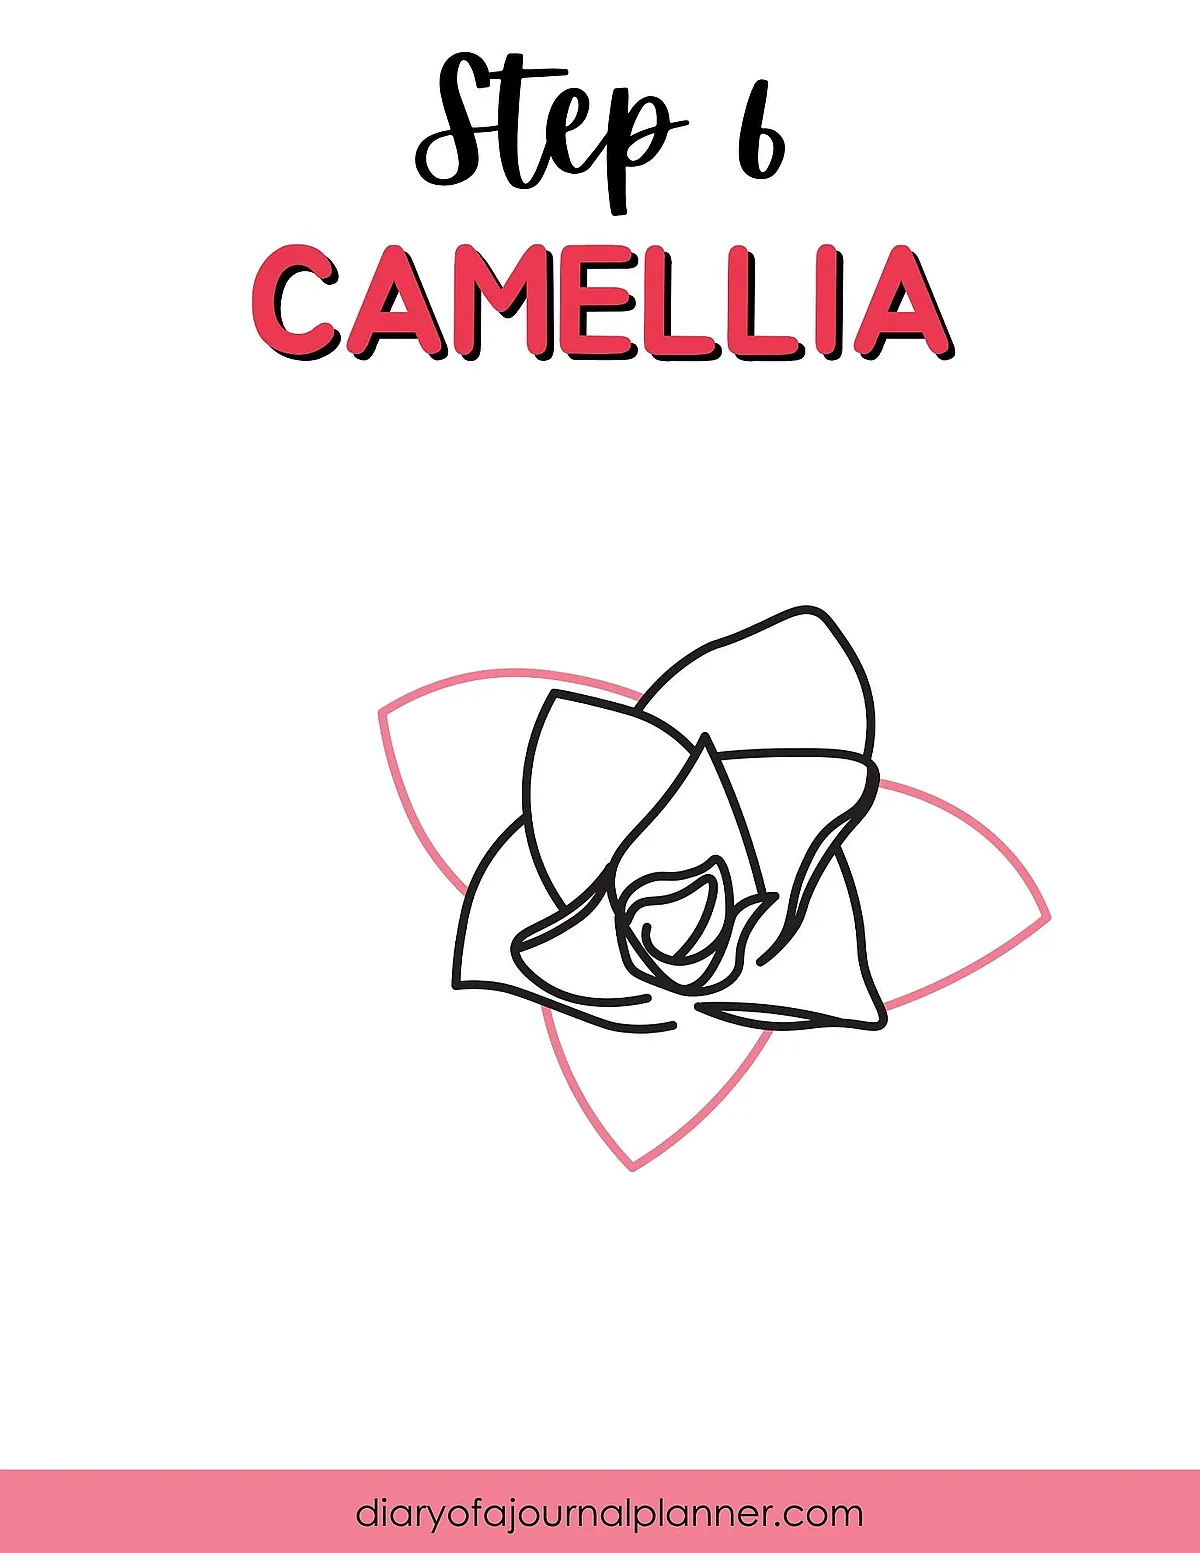
Step 6
Next draw three more petals. These petal do not need to be even, or the same. Nature is never perfect so your doodle doesn't need to be either.
Step 7
Next, add another layer of petals. Remember to keep in mind the overall shape and size you want your finished flower to be.
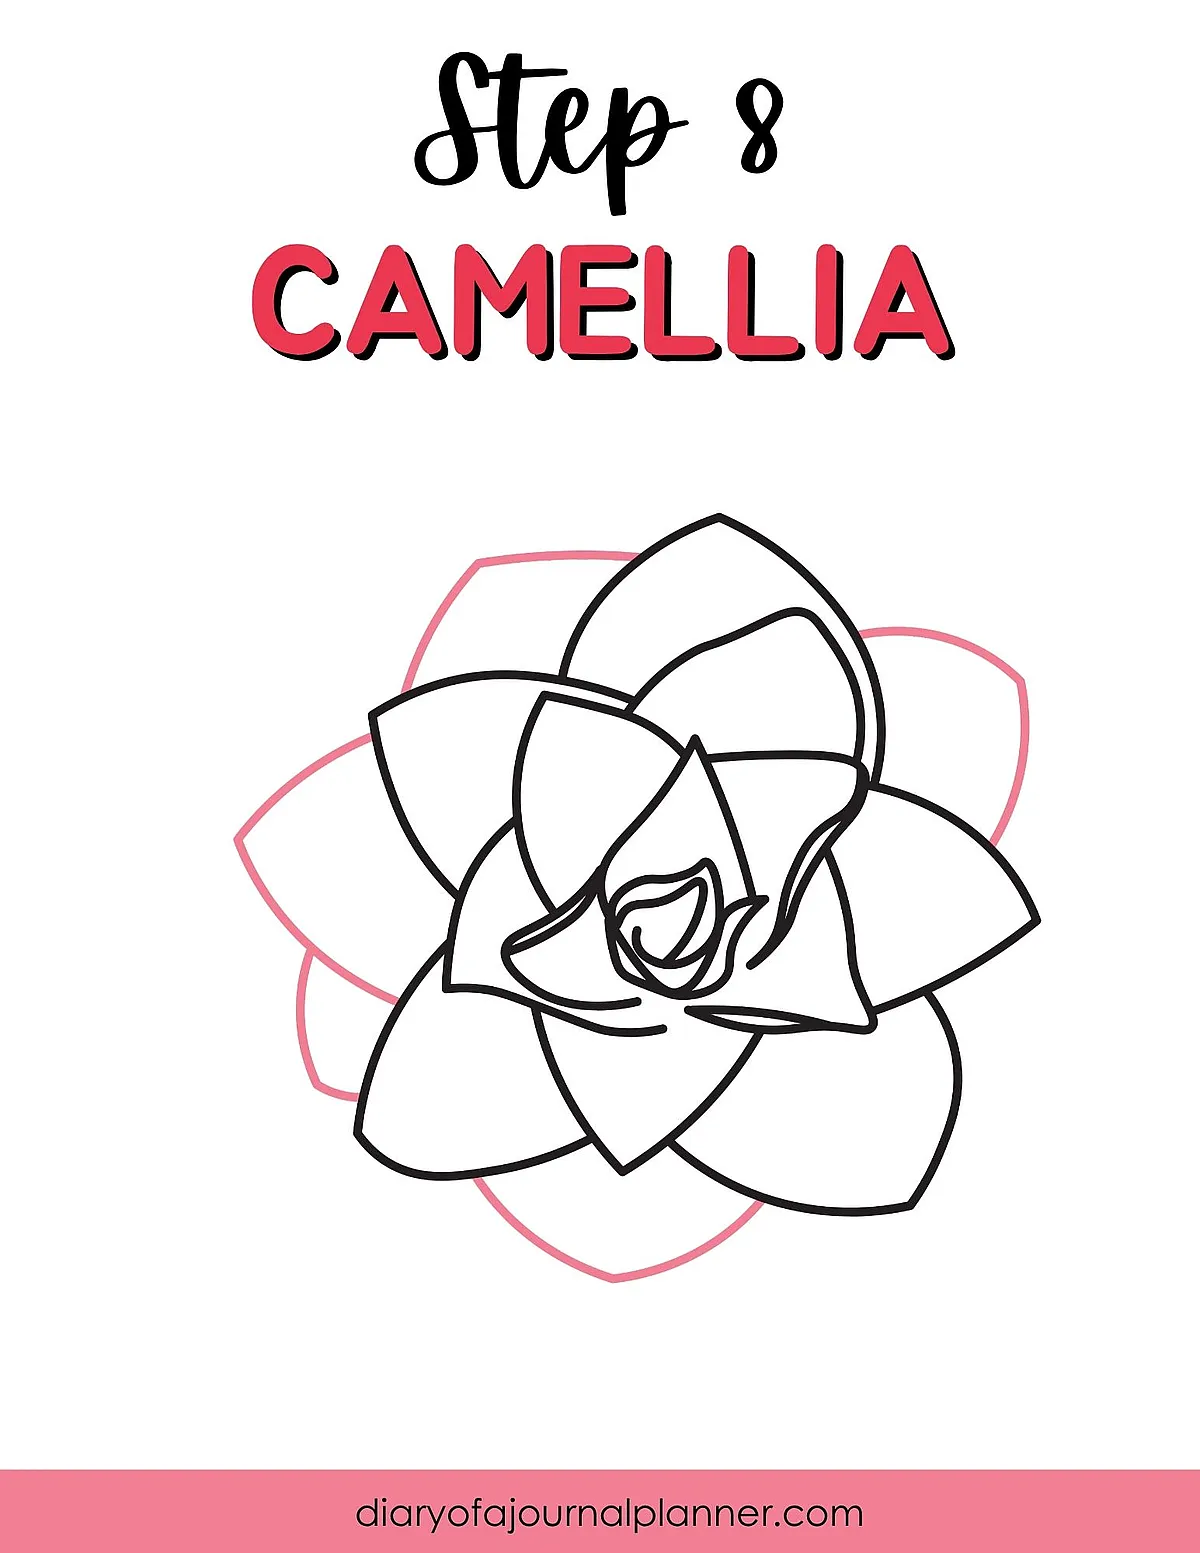
Step 8
Keep adding petals until you have a complete bloom. You can make them tighter for a closed Camellia or wide and open for a blooming one.
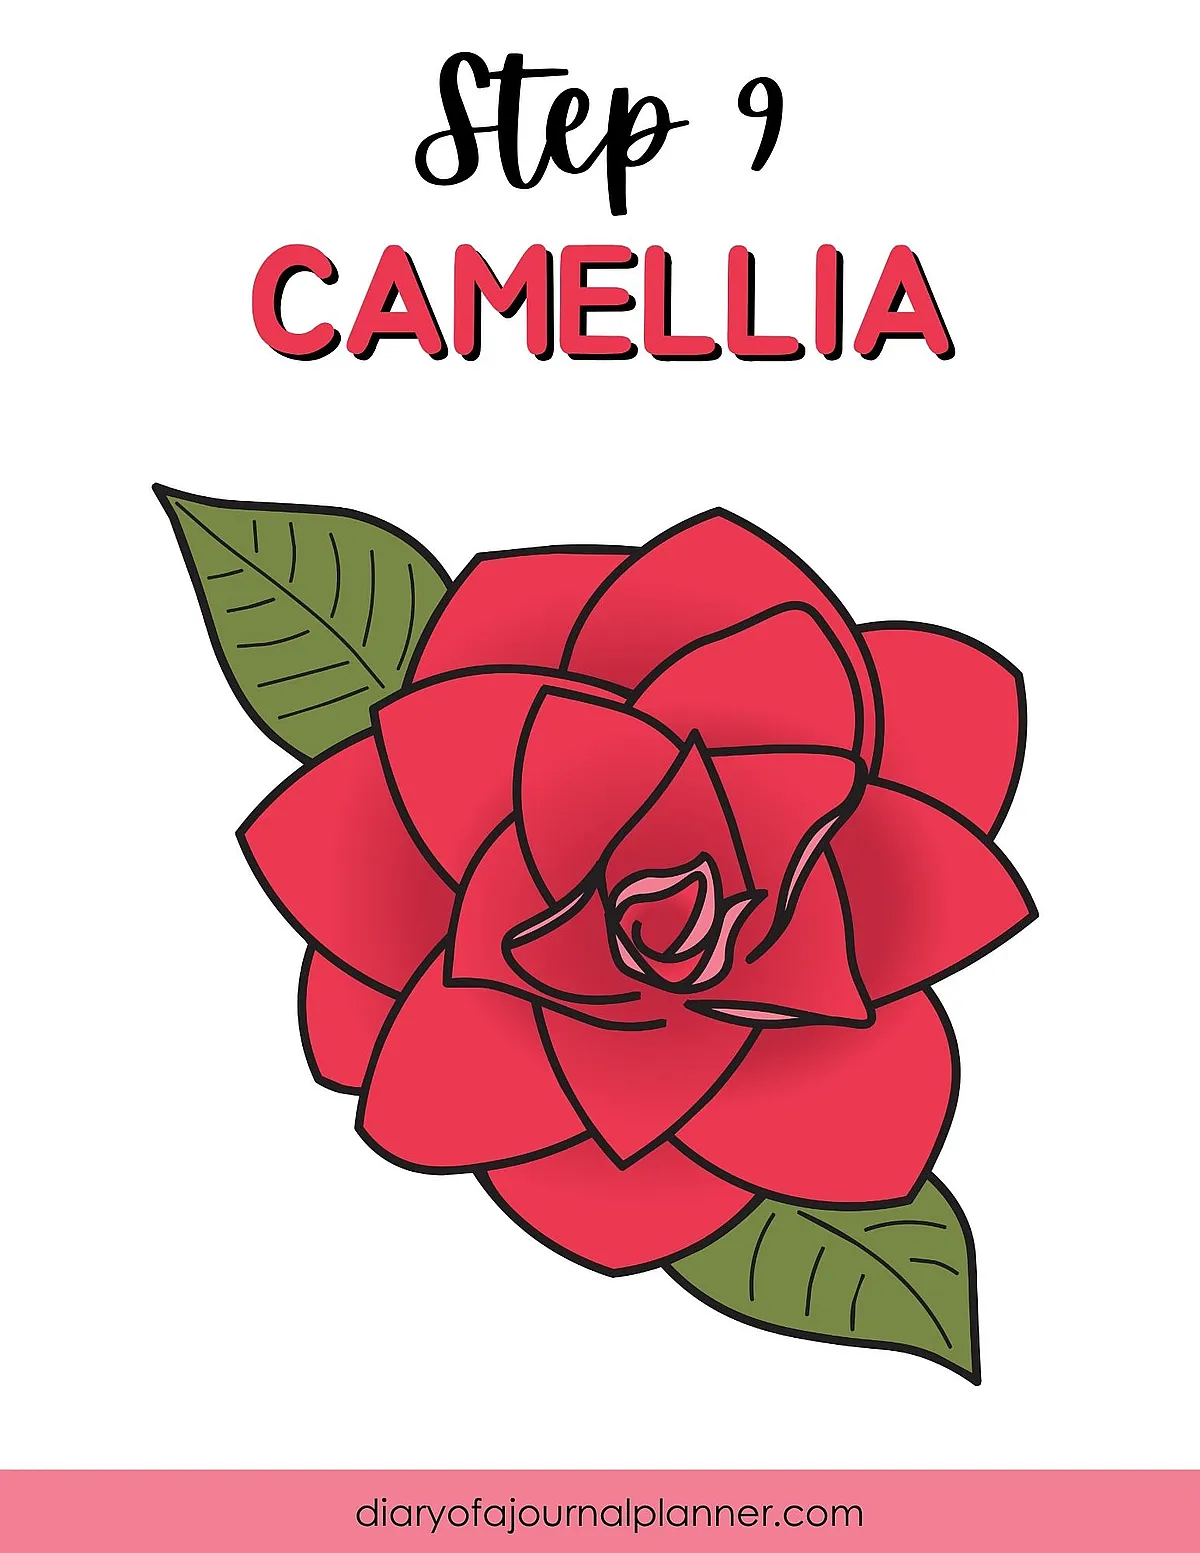
Step 9
The last step is to add a few leaves beneath or beside the flower. Camellia leaves are glossy and pointed. Then have fun and color your Camellia drawing.
Your Camellia flower drawing doesn’t need to be gallery-ready. It just needs to bring you joy. Keep it light, playful, and use each petal as a moment to unwind.
Every sketch is progress, and each page is a fresh start. Let those lovely blooms inspire your next journaling session or art break.
PIN FOR LATER!