Easy Tutorial For Hibiscus Doodle
Your hibiscus flower drawing is like a mini vacation for your bujo pages and art projects!
There’s just something about hibiscus flowers that screams sunshine, beaches, and good vibes.
They’re bold, bright, and full of that tropical magic we all secretly (or not so secretly) want a little more of in our lives.
So today it’s all about creating that big colorful burst with a fun hibiscus flower drawing that’ll liven up any bujo, junk journal, or art page.
If you’ve ever thought of adding tropical doodles to your journal but didn’t know where to start, the hibiscus doodle is the way to go.
It’s honestly way easier than it looks and once you draw one, you’ll be hooked.
Why a Hibiscus Flower Doodle?
First up, why hibiscus?
Well, besides being seriously gorgeous, hibiscus flowers symbolize beauty, joy and sunshine.
They can also mean new beginnings and welcoming energy – which makes them perfect for journal themes, vision boards, goal pages, mood trackers, and more.
Drawing a hibiscus instantly lifts the feel of a page. It’s like planting a little seed of happiness right there in your planner. Plus, if you’re doing seasonal spreads, these are awesome for summer layouts or even to add some warmth to winter pages when you just wanna dream of beach days.
Hibiscus flower doodles can be as detailed or as simple as you want. You can go for a big, bold colorful bloom or a soft minimalist line drawing. Both styles look stunning.
Fun Tips for drawing Hibiscus flower
Want your drawing of a hibiscus flower to look extra magical? Try these tips:
- Play with Colors: Traditional hibiscus flowers are pink, red, yellow, orange… but who says you can’t do purple, blue or a rainbow one? Go wild!
- Big Center Details: One of the iconic parts of the hibiscus is that long, pretty stamen in the middle. Don’t skip it – it’s what makes it pop!
- Petal Textures: Add light lines inside the petals for that soft, flowy look. It makes the flower feel alive and breezy.
- Mix with Leaves: Surround your hibiscus doodles with big tropical leaves, like monstera or palm fronds for that jungle feel.
- Doodle in Clusters: Draw a few hibiscus together with little vines or curly tendrils. It makes a gorgeous border for pages.
Also if you’re doing a drawing of a hibiscus in your bujo, try making the flowers wrap around a title or quote. It’s like the flower is hugging your words!
How To Draw A Hibiscus Doodle
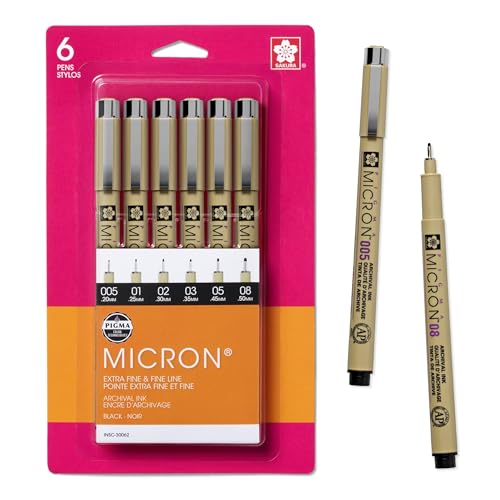
Hibiscus drawing supplies
Here are some supplies that will help you create amazing doodles:
- Paper or sketchbook
- Dual Brush Pens
- Pencil or mechanical pencil with a good eraser
- Or drawing pen (this is our favorite)
- Colored pencils or markers if you feel like adding color
- Optional: white gel pen for highlights or cute lil details


How to Draw A Hibiscus Doodle
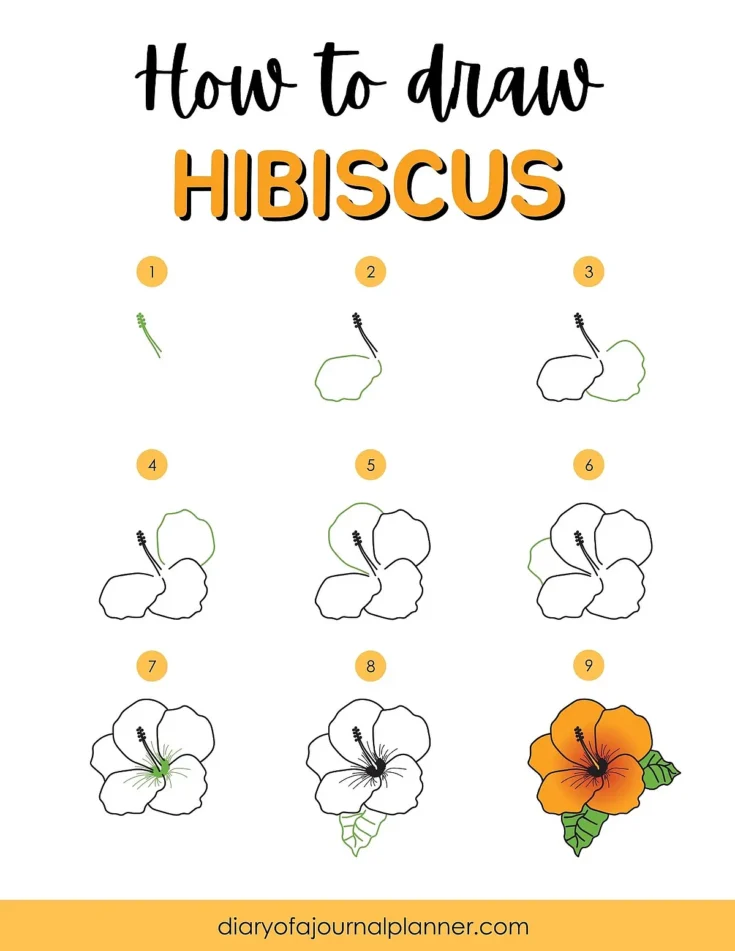
Follow along with our easy Hibiscus doodle tutorial. Simply follow each step by drawing the part of the doodle in GREEN.
Instructions
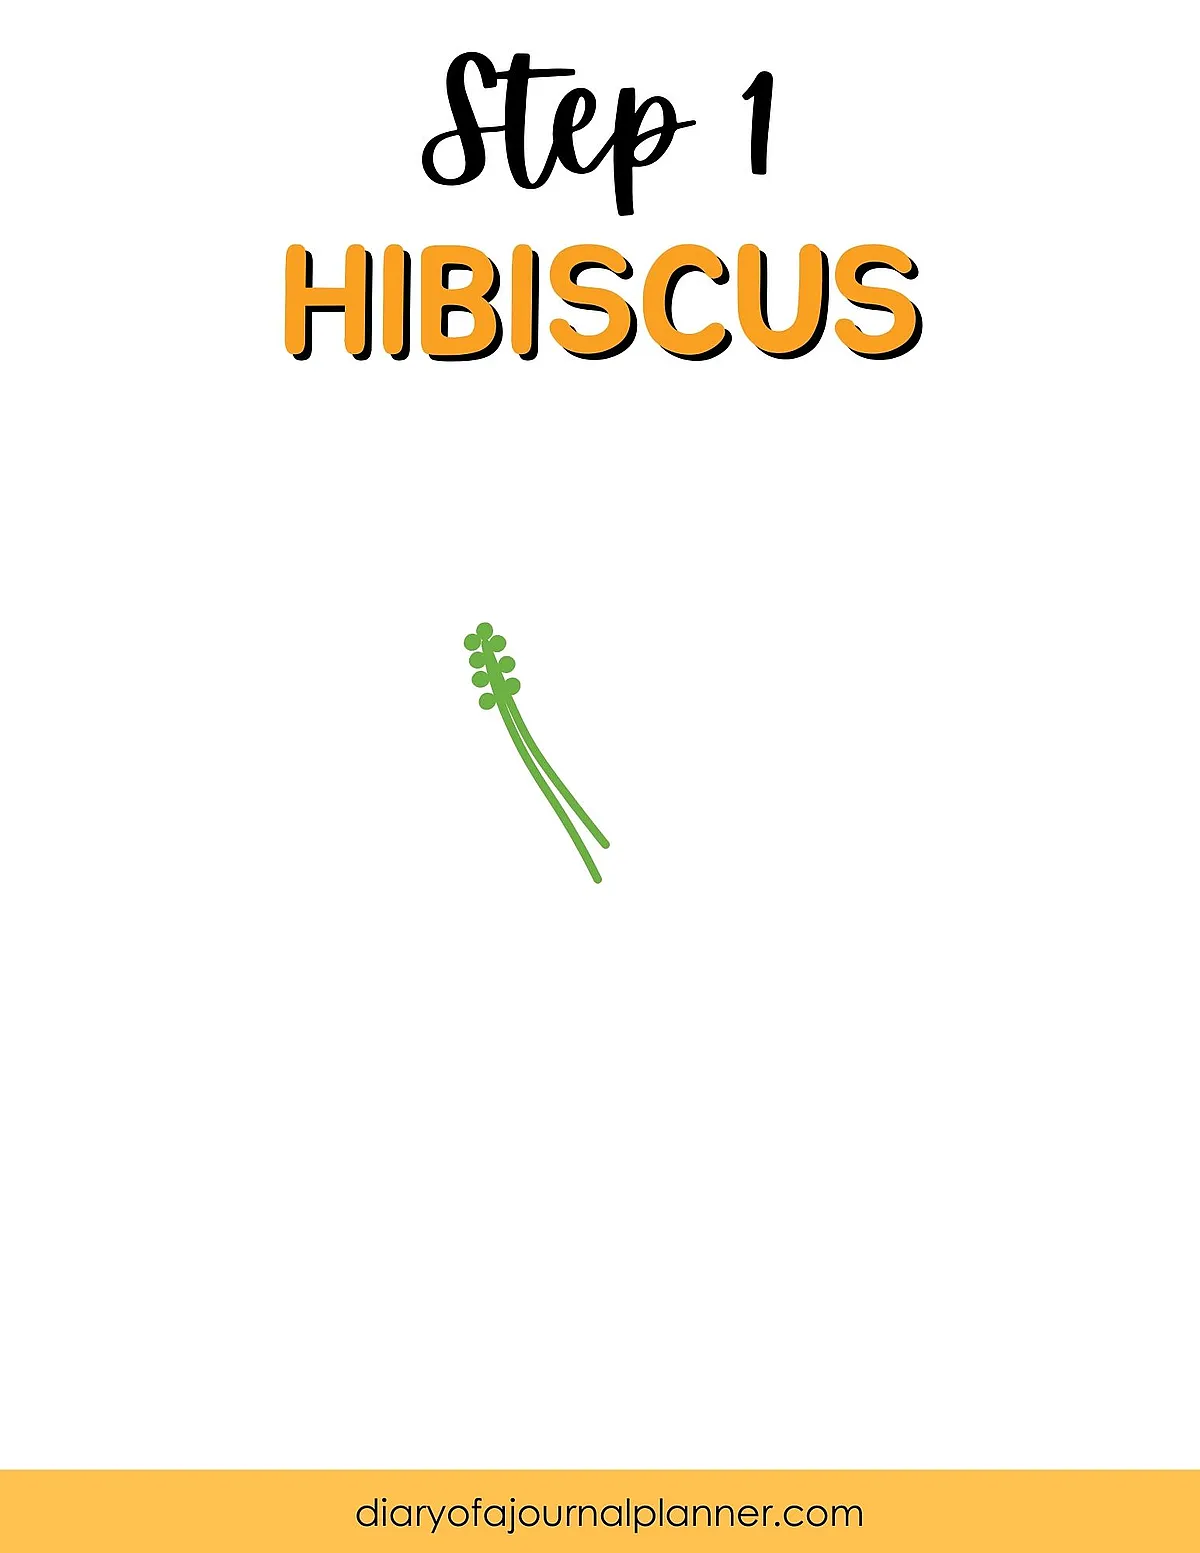
Step 1
Decide where you want your hibiscus flower drawing doodle on the page and start by drawing the centre of the flower.
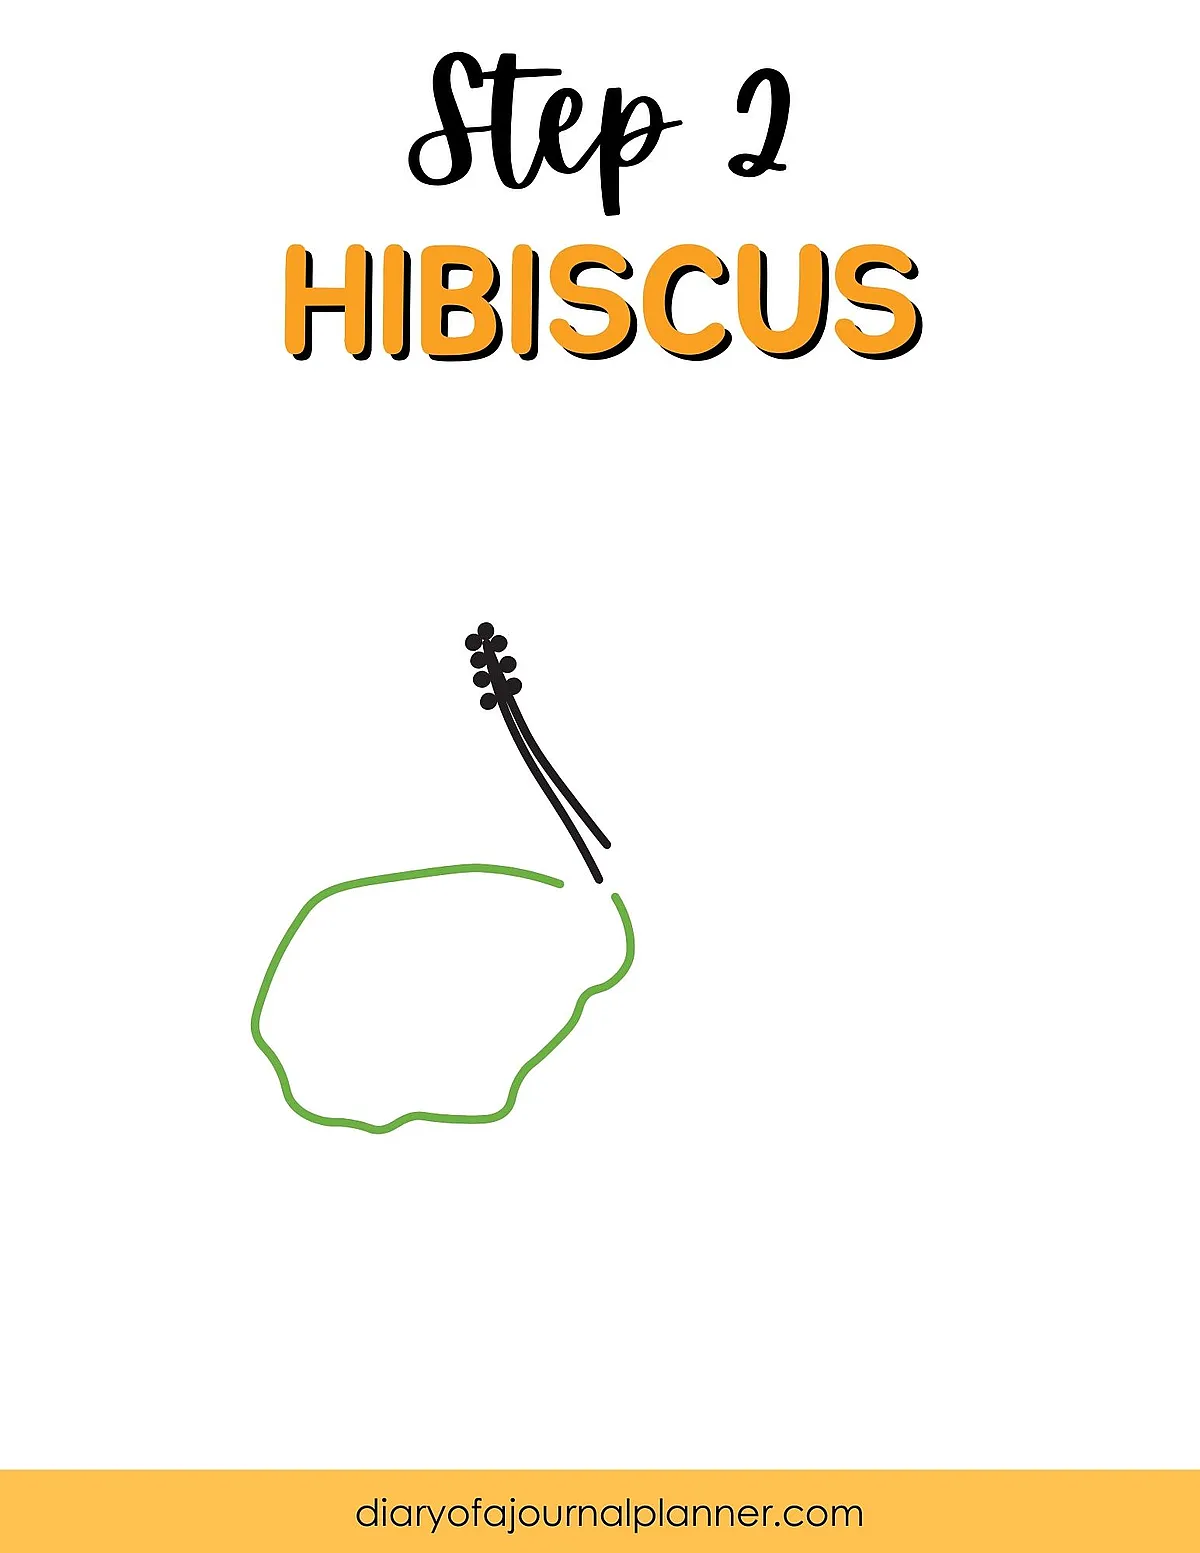
Step 2
Next, draw a petal. Do not make this too perfect, and add a subtle frilled detail on the edge.
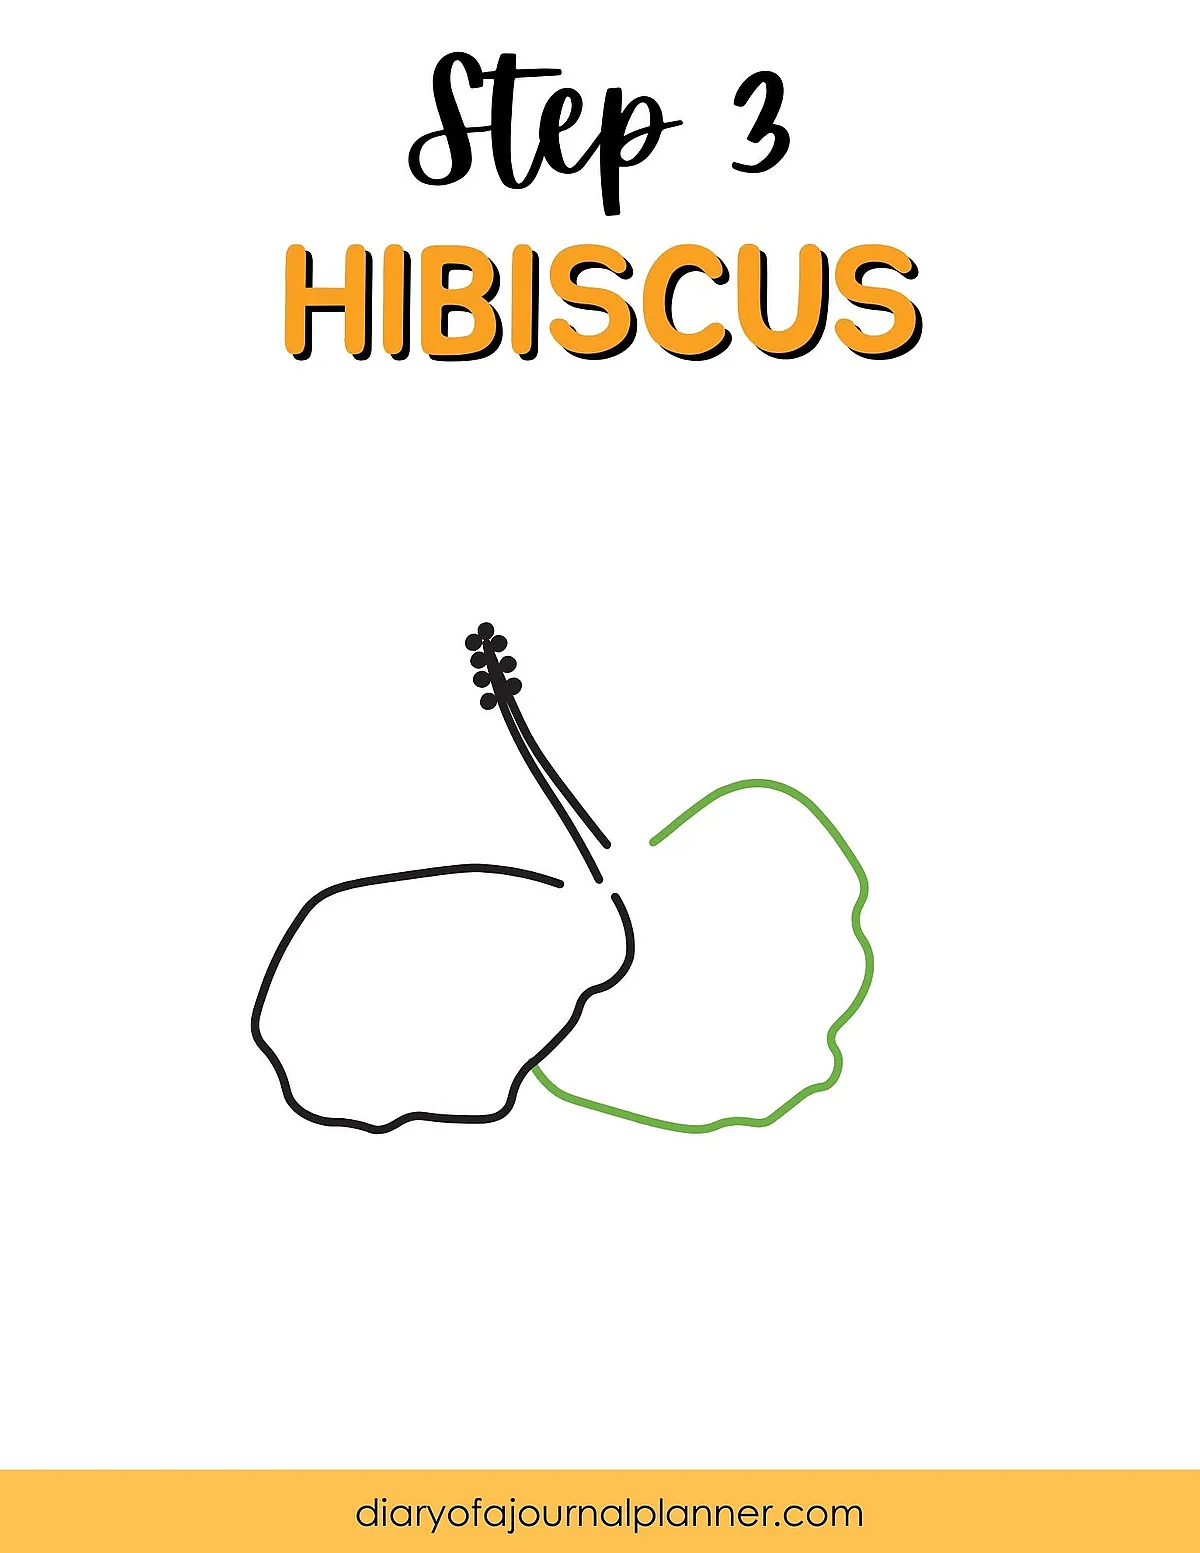
Step 3
Then draw a second petal next to the first.
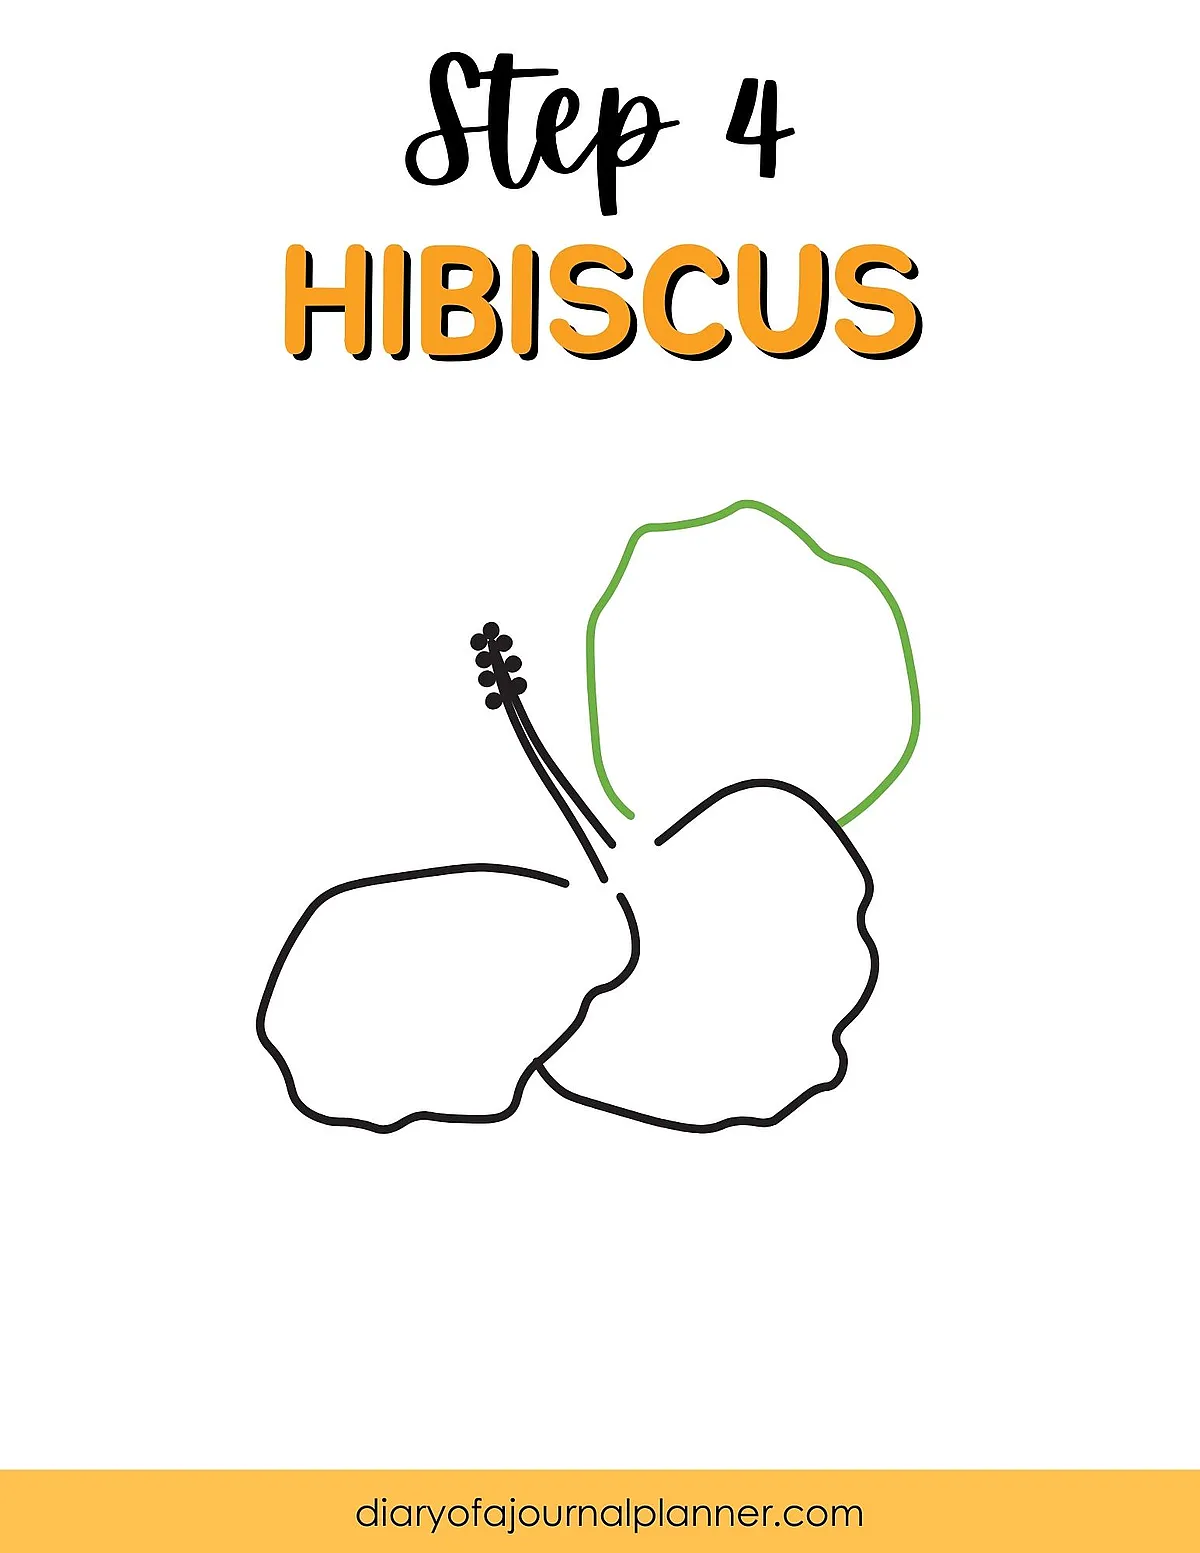
Step 4
Now start layering the petals. Draw a large petal behind and above these.
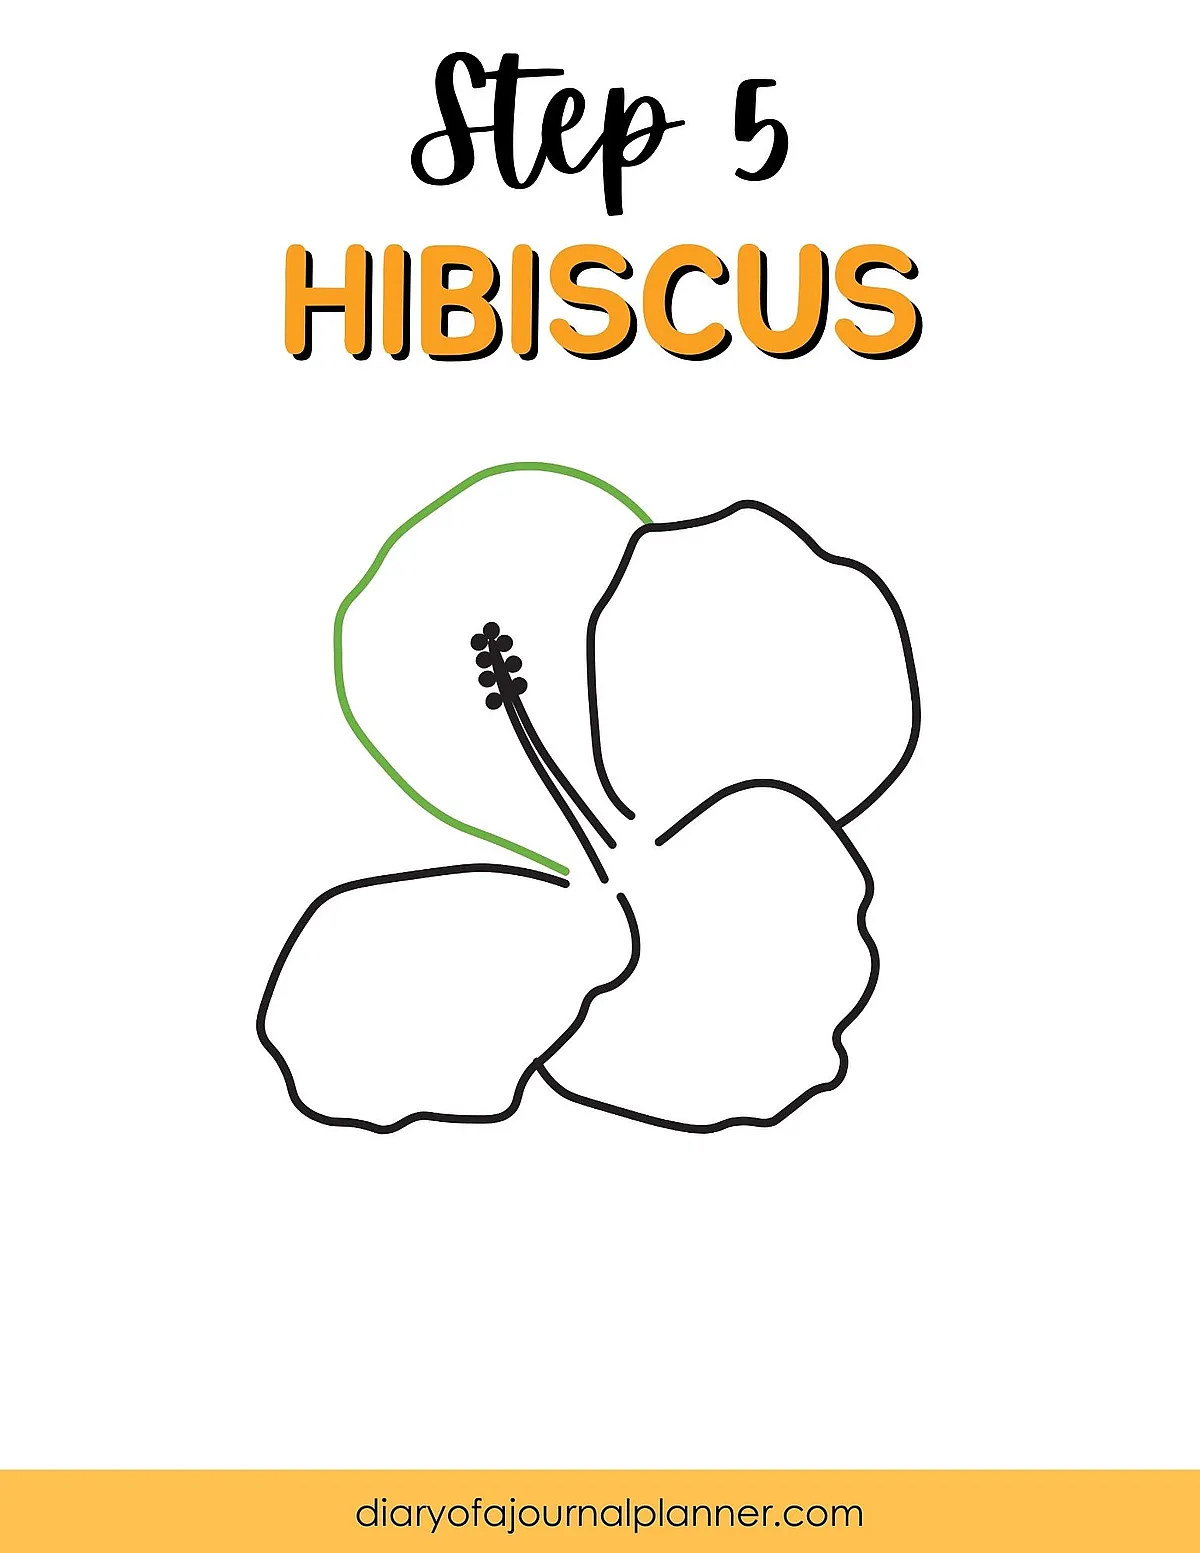
Step 5
Create another petal next to the last petal you drew.
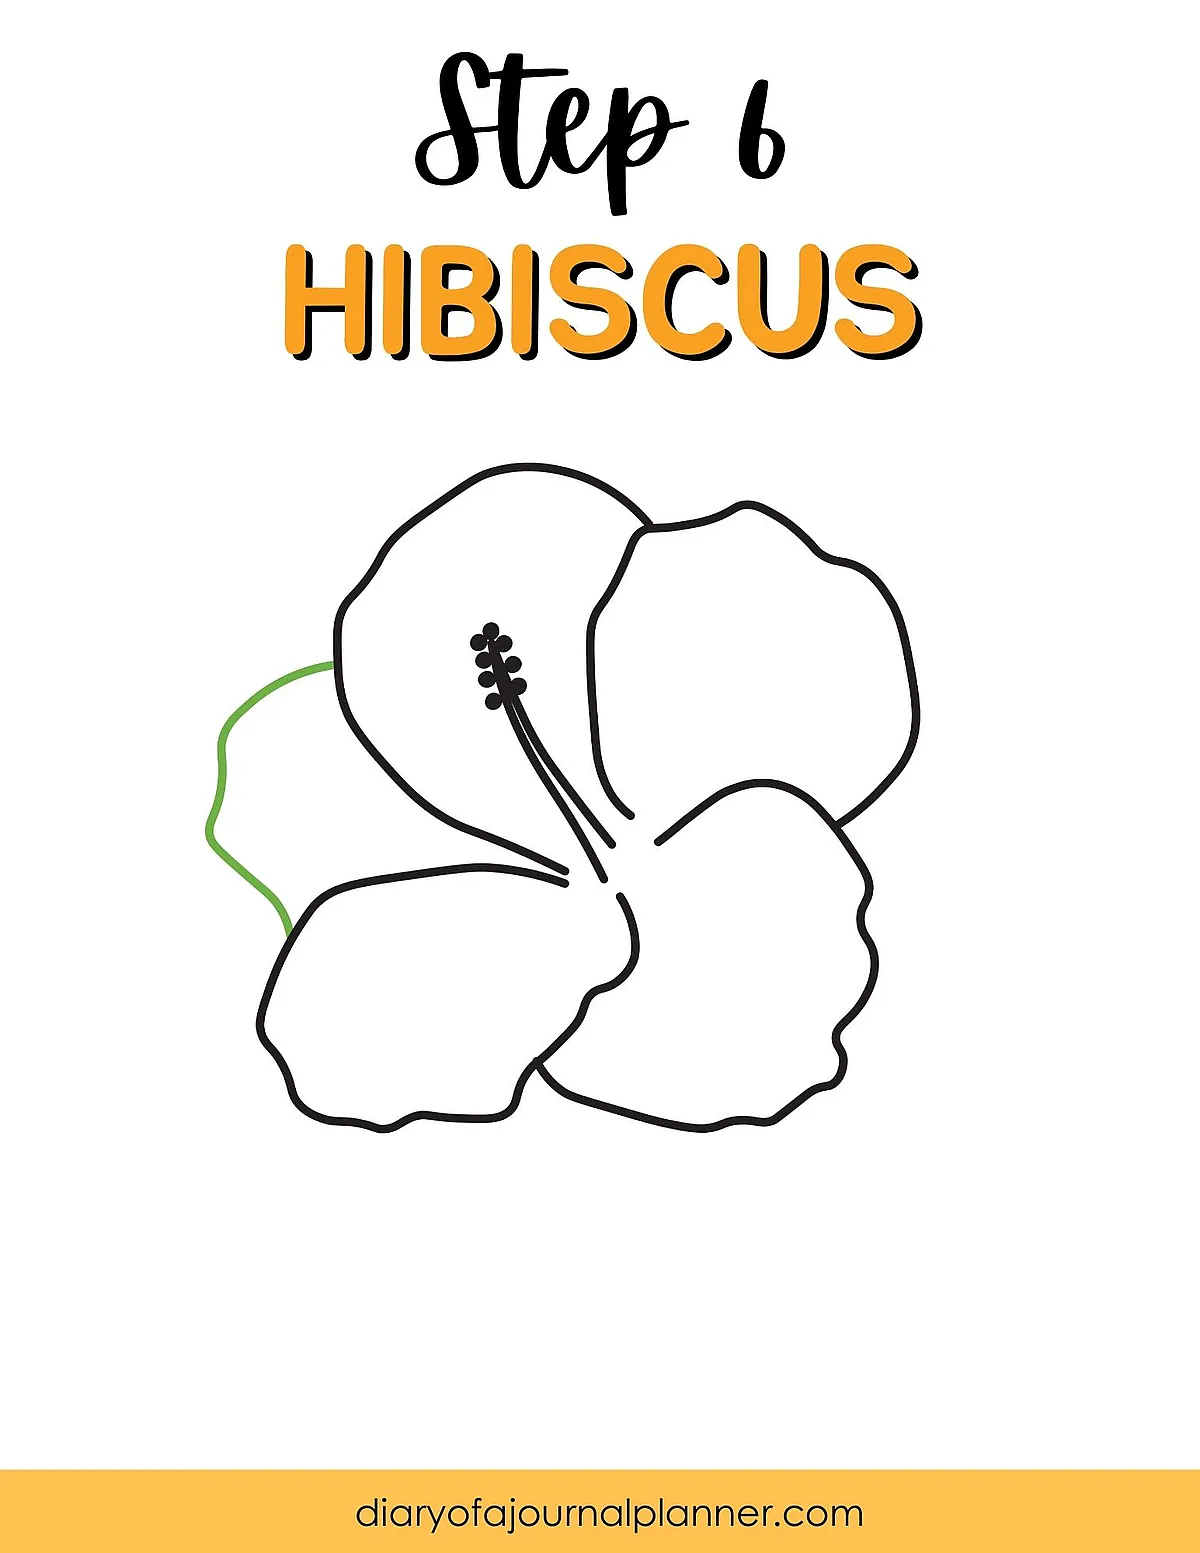
Step 6
Then draw the back petal to fill in the full bloom.
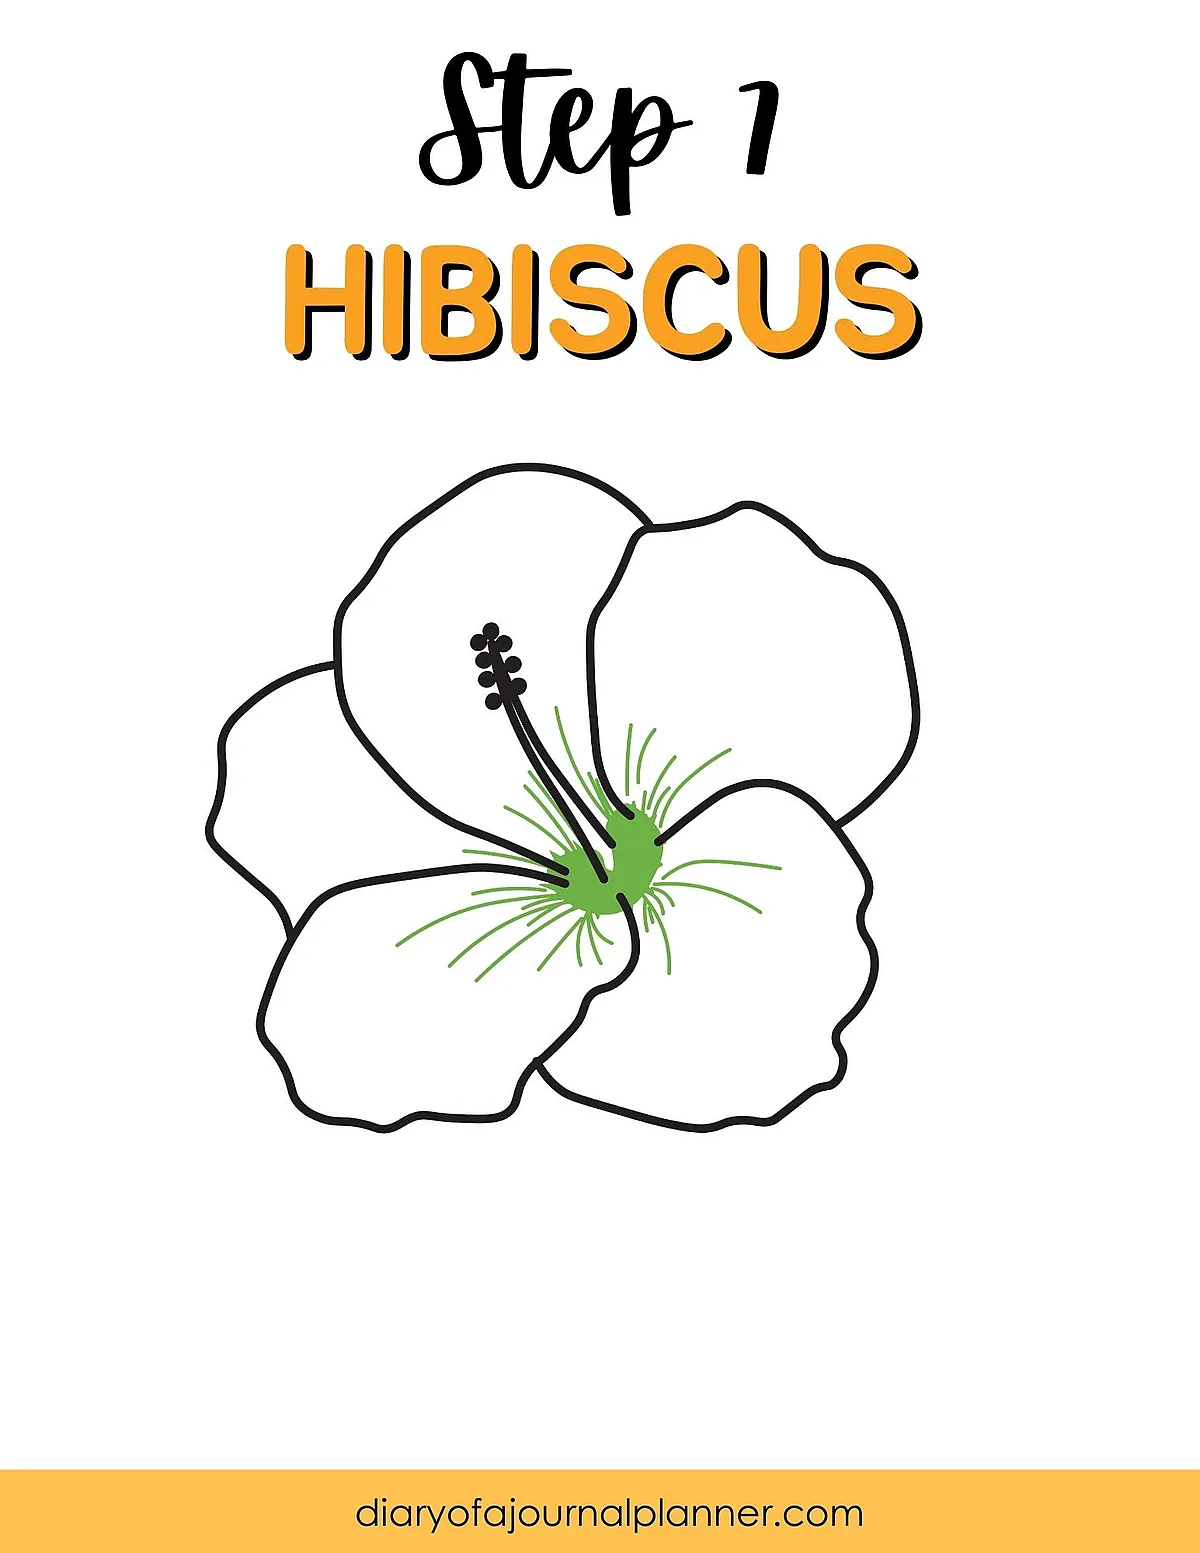
Step 7
Next, draw the details around the center of your hibiscus flower. These are very small lines with filled in detail near the center.
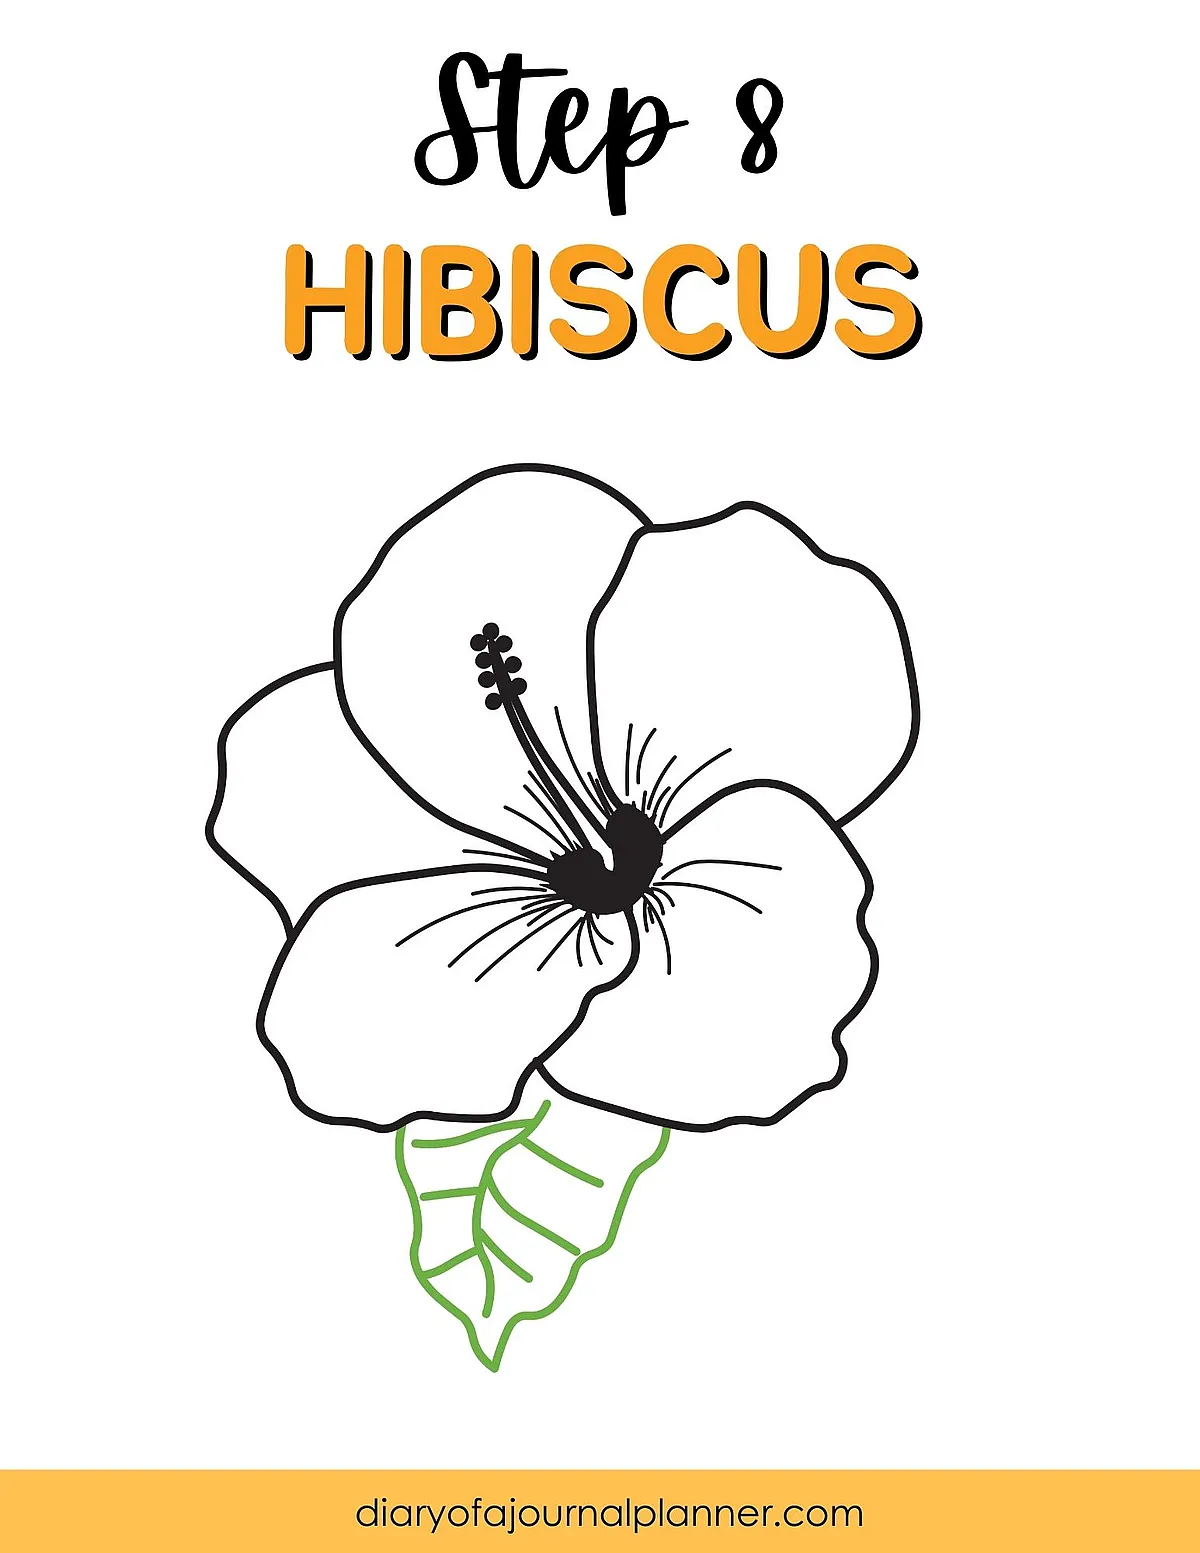
Step 8
Time to draw the leaves on your Hibiscus. You can do one or two.
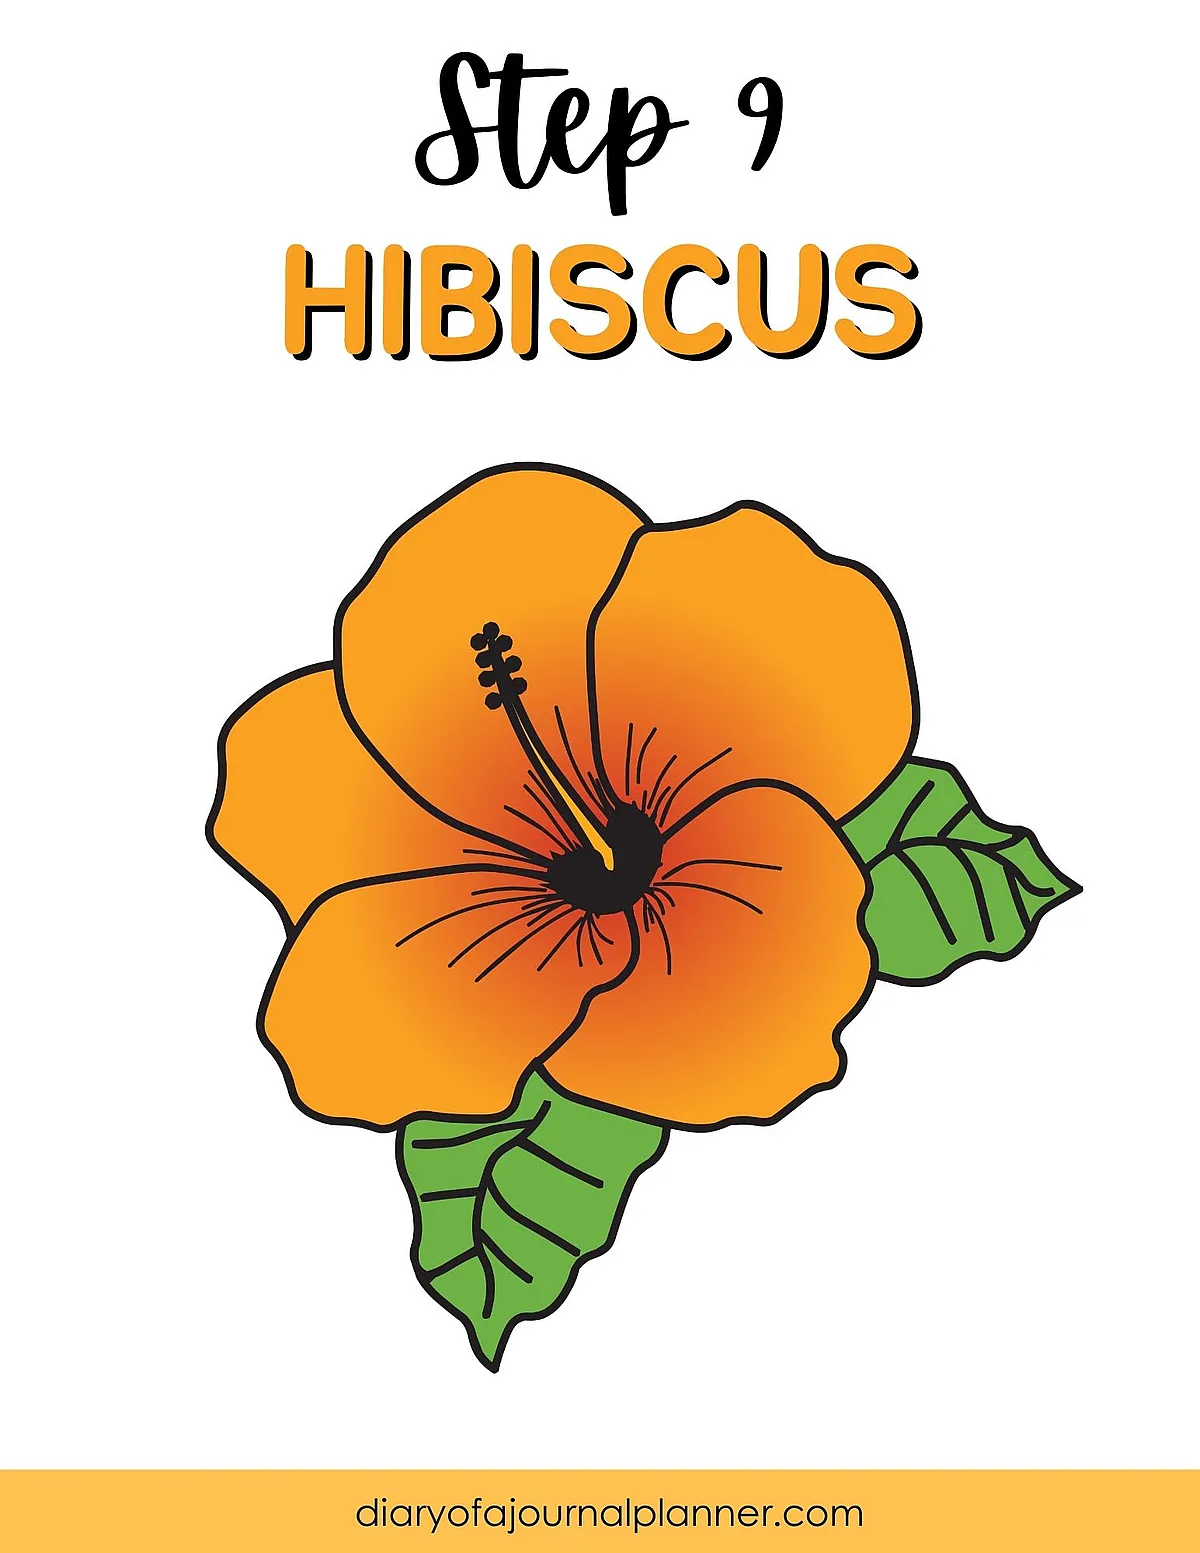
Step 9
The last step is to have fun and color your Hibiscus drawing.
Where You Can Use Your Hibiscus Doodles
You’re not gonna want to stop at just one once you see how much fun these are to draw!
Here’s a bunch of ideas to bring your easy hibiscus flower drawing into your creative projects:
- Bullet Journal Covers: Start the month off with a tropical vibe! Big hibiscus blooms around your month’s name look amazing.
- Habit Trackers: Use small hibiscus flowers as check boxes or decorate the borders to keep it fun and inspiring.
- Scrapbooks & Junk Journals: Perfect for summer holidays, beach trips, or dreamy vision pages.
- Cards and Gift Tags: A hand-drawn hibiscus makes any card feel extra special – think birthdays, thank you notes, or even party invites.
- Wall Art: Draw a giant colorful hibiscus, add a quote about sunshine or adventure, and you’ve got easy DIY decor.
- Mood Trackers: Fill a page with hibiscus flowers and color them in depending on your mood each day.
And honestly, sometimes it’s just nice to fill a page with doodles because it feels good. No reason needed.
Hibiscus Doodle Prompts to Try
If you’re sitting there with your journal open and your pen in hand thinking what now?? here’s some quick ideas to get you started:
- Draw a giant hibiscus in the middle of the page and fill the background with tiny stars.
- Make a tropical wreath of hibiscus flowers and leaves around your favorite summer quote.
- Create a pattern with mini hibiscus doodles – could be your bujo cover or a whole spread.
- Mix hibiscus doodles with coconuts, surfboards, and beach scenes.
- Doodle different color hibiscus blooms and label them like a flower study.
Seriously once you get into it you might not stop at just one page!
Adding a hibiscus flower line drawing to your journaling is like adding a little shot of sunshine and adventure. It’s easy, it’s vibrant, and it totally makes your pages come alive.
So grab your pens and markers and start dreaming up those tropical blooms
Happy doodling and keep making your pages feel like little vacations!
PIN FOR LATER!